During the Trek
|
At last, you are on the way, first day on the Kokoda Track. This section is designed to provide you with some insights into daily life on the track, how best to trek safely and other useful information about the on-track trekking section of your expedition.
Even if you are an experienced trekker, please take the time to read through this section for specific advice about the Kokoda Track environment. In this section we will cover:
|
|
Arrows may not center when in edit mode. Once site is published, the arrow will be centered on the tab
When the site is published, this border and note will not show up.
Drag & drop your tab 1 content here
Travelling to Kokoda
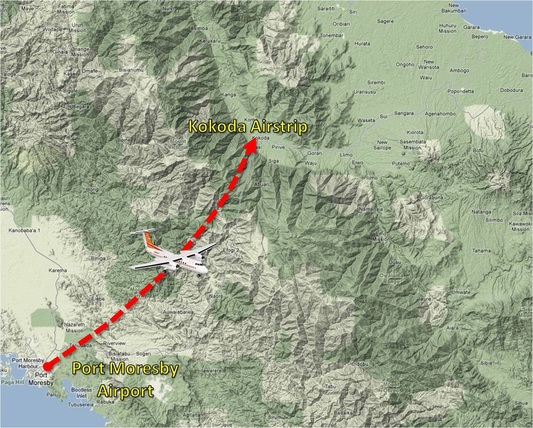
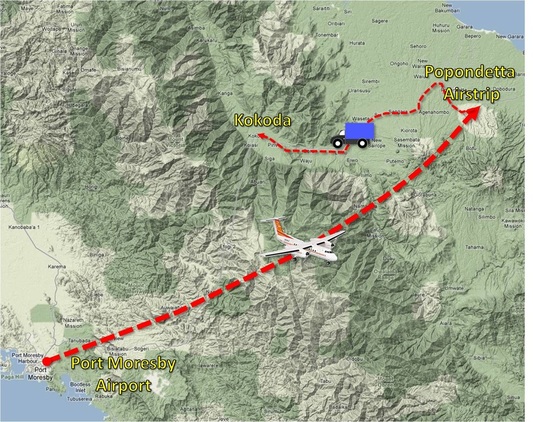
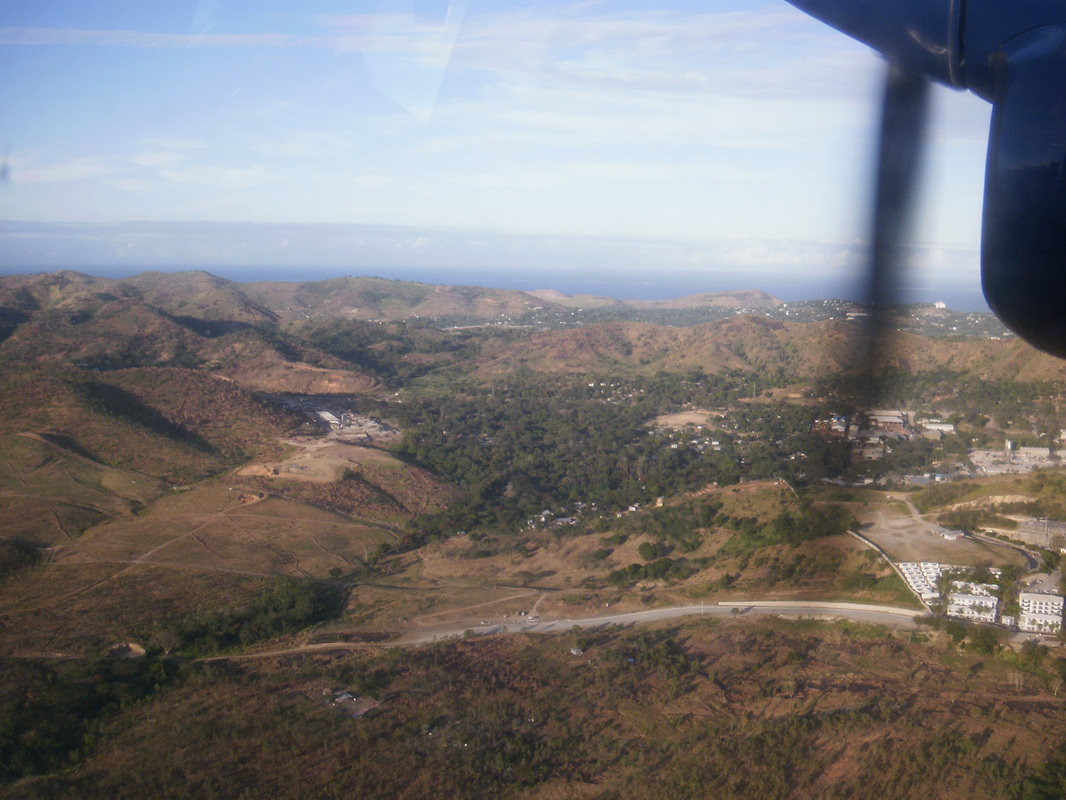
No Roads Expeditions uses two domestic flight options for Australian-led expeditions into Kokoda.
Your expedition guide will be able to indicate which flight path will be used to reach Kokoda, hopefully a week or so before you arrive in PNG.
Due to operational reasons this may change at short notice (sometimes even the day before) and it is important to note that either of the two routes may be used. Both are exciting so don't worry!
Please note that there may be unexpected delays in departure which is normal and expected when travelling in PNG, often beyond the control of tour operators.
Your expedition guide will have your domestic flight tickets as part of a group booking. You do not need to locate them.
Flight Path 1
|
Flight Path 2
|
Packing for Domestic Flights
As the planes used for these flights are small passenger aircraft, the weight of the passengers and cargo is more critical to ensure a safe flight. As you prepare to board the aircraft, you may be weighed so that the pilot can work out how much all the passengers weigh in total - and your pack may be weighed to check it is not overweight.
As with most domestic air routes your luggage will be subject to inspection and x-rayed prior to departure. Trekkers who fly via Popondetta will need to ensure that items such as knives/screw drivers or multi-tools are not carried in your carry-on luggage (day packs if you have one). To avoid delays please ensure these items are packed in your backpack which will go in the luggage hold.
Listen to your Expedition Guide for advice on packing for the domestic flight. Ask questions!
- Your pack weight should be close to 12 kg (without water) - see the Gear Selection page for more information on what gear you should have, and the Packing for Trekking page for what should be packed where for the trek.
- To prevent accidental loss of equipment, or opportunistic theft, please ensure all items are tucked inside your backpacks and not hanging on the outside.
- Keep valuables such as money, passports and cameras with you at all times.
- In the domestic terminal waiting room there is usually a bottled water supply. If this water supply is available you will be able to fill your own water bottle for the flight and subsequent PMV trip to Kokoda. Water is often not allowed when passing through domestic security/customs, sometimes it is!
- Your trekking poles may get bundled together with the rest of the poles from the expedition team. One large bundle in the cargo hold is easier to manage and poles are less likely to get lost or broken as a bundle.
Drag & drop your tab 2 content here
Daily Routine
The expedition spans eight days and seven nights on the Kokoda Track. Every day is different with new sights and experiences, however the daily routine is fairly similar. We are often asked by clients what a typical day might be like which is why the following "sample day" is provided for your information. Just remember, this is a guide and that some days are longer or shorter than others. Also check out our Day by Day Expedition videos.
Daybreak (5:00 - 6:00am)
|
Final Prep (6:00 - 6:30am)
|
Trekking (6:00 - 7:00am)
|
Lunch - Rest (middle of day)
|
Trekking
|
Arrival Camp (2:30 - 5:30pm)
|
Free Time (until dinner)
|
Dinner (5:30 - 6:30pm)
|
Bedtime (6:30 - 8:30pm)
|
Drag & drop your tab 3 content here
Packing your Backpack
Packing for trekking is something you will be doing several times a day. To reduce the frustration of stopping on the Track and needing the one item that is buried at the bottom of your pack, consider the following advice.
For both a backpack and daypack we recommend:
For both a backpack and daypack we recommend:
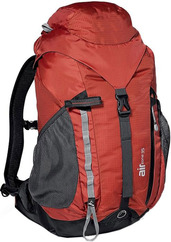
- Use a waterproof pack liner or large heavy duty garbage bag as a liner inside your pack. Pack everything inside this liner.
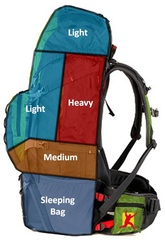
- Pack heavier items towards the mid/lower sections of the pack.
- Keep your daily portion of food snack items in an outer pocket so you can get them easily without opening the main compartment. Keep the rest inside your pack.
- Place frequently used items in locations where you can find them quickly once the pack is opened.
- Use different coloured stuff sacks to help locate items quickly.
- Avoid hanging too many items on the outside of the pack as they may snag and fall off.
- Use small zip-lock bags for items such as money, insurance paperwork, documents and valuables storage.
- Remember that 1 litre of water = 1kg of weight!
Weight Distribution
|
PNG Guide Team Maximum weight = 20.0 kg
Ideal weight = 12 to 13 kg (without water) |
|
Daypack
|
Maximum weight = 10 kg
Ideal weight = 5 to 6 kg (without water) |
Suggested items for your day pack are:
Your personal guide is likely to be nearby most of the time during the day. You can ask to access your backpack any time to get things.
|
Timing - packing Efficiently and Quickly
The key to success with packing quickly and efficiently is to practice before you arrive in PNG taking into account when you are likely to be packing / repacking on the trek. See our daily routine page for more about a typical day on the track.
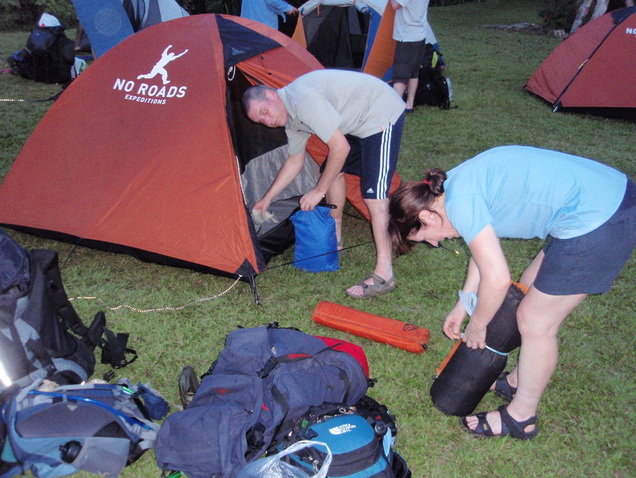
- Each morning when you wake up you will need to quickly re-pack your pack so the Campsite Manager Guide can pull down your tent, sometimes an hour before you will be leaving. Usually this means a quick pack and move out of the tent, perhaps moving under a shelter to finish packing.
- You cannot let packing distract you from eating breakfast, lunch or dinner. It is vital that you eat all meals and that you speed up your preparations to allow time for food.
- You will be time poor in the morning: eat breakfast (allow time to digest), go to the toilet, brush teeth (purified water), collect water and purify it, get changed into trekking clothes, boots on, prepare daily snacks, repack campsite items into your pack (sleeping bag, mattress, night clothes etc..), fiddle/set up camera, put on sunscreen/insect repellent, stretch, have medicines, find and adjust poles for correct height, and prepare feet or look after injuries.
- At night you will have more time but as it gets dark, it will be VERY dark quickly. Only the light of the camp fire and your head torch will assist you in seeing things. Packing in the dark is not as easy as you might think. Having a routine that is well practiced is worth considering.
- Set-up your tent before dark. Inflate your mattress, set-up your bed, change into night clothes, have medicines as required, look after injuries, rinse clothes in water and wring dry. If sunny you may get a few hours of drying time but after dark everything gets wet.
- Some people prefer to collect and fill their water bladder and bottles ready for the next day each night, with purification completed and ready for the morning.
Drag & drop your tab 4 content here
Getting Along with Each Other
Whilst everyone will have done their best to prepare for the trek, standards of fitness and capability amongst the trekkers will vary and some maybe suffering from health issues they were unaware of before starting the trek. Your Australian guide and the lead porter will do their best to manage this and may in some circumstances split the party during the day’s trekking but in general, the party can only go as fast as its slowest member. Please be patient. If the slower people feel demoralised, that won’t help the situation.
Remember there is some flexibility in choice of camp site and the expedition guide and lead porter will make a best judgement call as to how far the group will travel each day. Don’t worry, you will get there. No Roads has an excellent track record in terms of getting people through the trek. The porters work well as a team, providing assistance where it is most needed.
Remember there is some flexibility in choice of camp site and the expedition guide and lead porter will make a best judgement call as to how far the group will travel each day. Don’t worry, you will get there. No Roads has an excellent track record in terms of getting people through the trek. The porters work well as a team, providing assistance where it is most needed.
Remember that you will be living at close quarters, in demanding conditions, with several people who may previously have been strangers. Tempers can get frayed – perhaps because someone may be doing it tougher than you realise. Be prepared for this, try to be tolerant of others and have strategies for resolving tensions as they occur. The word ‘sorry’ goes a long way.
Refrain from drinking. Alcohol is not tolerated within the villages and is not advisable when trekking.
On the positive side, many groups of trekkers find that they establish a strong bond through the mutual support that they are able to provide each other, and hold regular reunions where they can relive their adventures for many years to come.
|
Drag & drop your tab 5 content here
Health and Hygiene
One of the biggest health risks on the Kokoda Track is picking up a stomach bug. This can lead to dehydration from the associated vomiting and diarrhoea. Personal hygiene is one area that a trekker needs to be extra vigilant about while on the Kokoda Track. The entire trip can quickly turn into disaster if a stomach bug is picked up.
Care needs to be taken with the food and water consumed not only on the track, but also prior to starting on the trek. A bug picked up in Port Moresby the day before the trek may not manifest itself until a later stage, on the track.
It is possible to stay healthy while trekking the Kokoda Track. All that is required is to be aware of the risks and have effective strategies to reduce those risks.
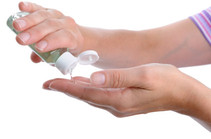
Washing HandsHands should be washed regularly especially after toilet stops and just prior to eating. As in normal hygiene measures in the city to guard against bacteria and viruses, you should avoid putting dirty hands in your mouth, nose and eyes as this is a common way for nasties to enter your body.
|
The alcohol‐based hand wash gels are perfect for trekking. Just a small amount is required to effectively sterilise the hands once all the visible dirt has been removed, so only a small bottle needs to be carried on the Kokoda Track. Keep a bottle in one of your outer pack pockets so you can access it easily, otherwise you may decide not to use it when you should if it is buried deep in your pack.
No Roads will place a bottle of the hand wash on the table for all meals and at the campsite.
No Roads will place a bottle of the hand wash on the table for all meals and at the campsite.
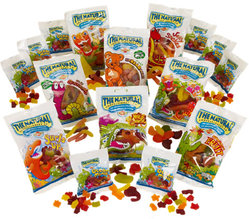
Sharing FoodIt is very tempting whilst trekking to reach into a bag of lollies offered by your mates and eat them. Did you wash your hands? Did other people wash theirs also? Whilst this might sound pedantic and an overkill, a bout of gastro could very easily spread throughout an expedition group quickly ruining your trek.
Always think about hygiene to help prevent infection. |
Buying fruit from the villages along the track is one of the simple pleasures of a trek along the Kokoda Track. Avoid purchasing or eating any food that is not prepared by No Roads guides unless it is original form, such as a banana. If you open the fruit, such as a banana, you can check for contamination.
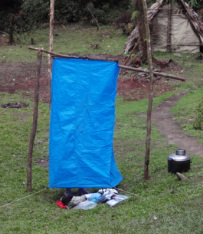
ShowersWe are the only company that discourages washing in rivers with soap. Even biodegradable soap pollutes. Whilst most people either duck into the river, creeks or local shower (water pipe) for a rinse, we provide a portable shower tent that is erected away from rivers and streams.
If you wish to wash with soap, we provide the liquid soap and the shower tent. If you want a hot shower that can be arranged for ten kina with all raised money going to the porters who need to fetch the water and boil it for you. Not all villages will have a shower type facility. In some locations the nearby river or stream will be used for bathing (without soap). |
Toilets
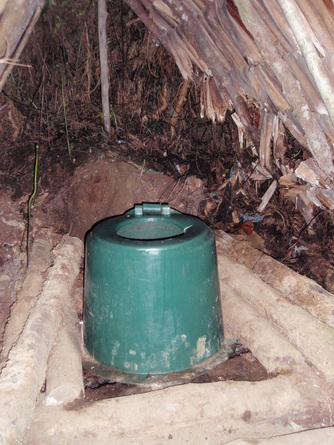
The Kokoda Track is in a remote jungle location with very small villages dotted along the track. These villages usually have a lean-to style shelter with a pit toilet located under it. They are not what you might currently be used to, but you will get used to them very quickly.
Make sure you bring with you a few rolls of toilet paper as you will not be able to resupply anywhere along the track. You may need to go more frequently than you do at home so bring more than you would expect to use.
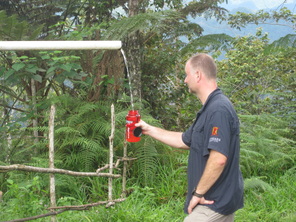
You MUST wash your hands after you go to the toilet using antibacterial hand wash. Do not wash directly under the drinking water supply or use your dirty hands to turn on a tap.
In some locations No Roads Expeditions has assisted with an important project called "Krappers for Kokoda" where $20 from your expedition fee will be used to purchase and install environmentally-safe eco-toilets along the Kokoda Track. These toilets will ensure the Track remains pristine for generations to come and help local communities.
|
There are eco-toilets installed in several locations along the Track. No Roads has assisted in having these toilets installed and more are planned. Check out No Roads Expeditions Foundation website for more info.
|
|
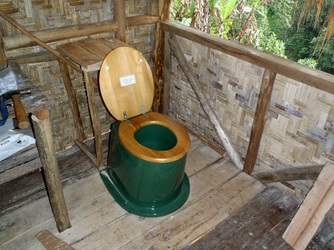
Most of the toilets along the Kokoda Track are pit toilets with either a seat (as pictured) or a hole. They are placed under small shelters and found in most villages. Some have doors and some don't!
Handy hint - keep your toilet paper roll on a short length of string around your neck so it doesn't roll away or drop into the dirt or puddles. Place your hiking pole at the entrance to let people know you are inside. |
Toilet Stops Whilst Trekking
If you need go to the toilet off the Track, please consider the environment and others.
If there is no toilet, then walk 50 metres away from water and 10 metres from the Track, dig a 15 centimetre hole and bury your waste and the toilet paper as well.
Look out for stinging nettles!!
If there is no toilet, then walk 50 metres away from water and 10 metres from the Track, dig a 15 centimetre hole and bury your waste and the toilet paper as well.
Look out for stinging nettles!!
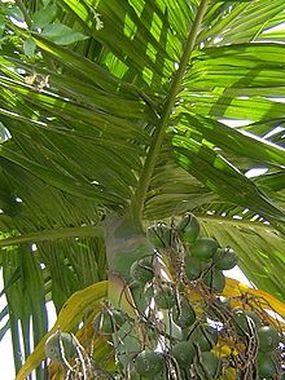
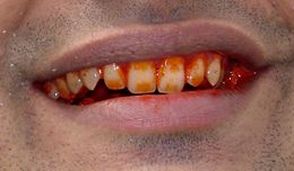
Dangers of Betel NutIn Papua New Guinea one of the first things you will notice is the brilliant red-stained teeth and lips of the local men and women. Betel nut, or what the locals call buai [boo-eye] is the cause.
Green betel nut is a nut that grows in the tropical climates of South East Asia and is popular in the South Pacific Islands. It can be found on every street corner in Papua New Guinea and is chewed as part of social occasions or as a part of everyday life. Betel nut has a mild stimulant effect and in addition to reasons of tradition local people chew it for stress reduction, heightened awareness, and suppression of hunger. The Betel Nut is a proven carcinogen. While relatively uncommon in other countries, oral Squamous Cell Carcinoma (SCC) is the most common malignant cancer in Papua New Guinea, with an average 47% mortality within 5 years of diagnosis. One study shows chewing Betel Nut increases the risk of oral cancer 28-fold. Do not try Betel Nut please. Betel Nut is a drug and can become very addictive. In recent years several trekkers have ignored our advice and taken betel nut. They subsequently became very sick which ruined their expedition. References: |
Drag & drop your tab 6 content here
Hydration and Purification
|
The most vital aspect of keeping healthy on the Kokoda Track is keeping hydrated. Excessive sweating from the physical exertion is the main source of loss of body fluids. These fluids can also be lost from the body by vomiting and diarrhoea from a bacteria or virus.
The big danger on the Kokoda Track is when these causes of dehydration work together. That is, a trekker who is slightly dehydrated from the excessive exercise may catch a vomiting bug that expels more fluids from the body and also prevents the body from absorbing fluids. This is a dangerous situation and can be fatal. To prevent any chance of dehydration, you need to be continually taking in water. |
A hydration bladder with tube is best as you can sip during the trek. Water bottles are suitable, but you need to stop to take in the fluid and we have observed that trekkers do not drink water as often as they should if they have water bottles that require removing from the side pockets of their pack.
Your thirst is a natural gauge for your hydration. If you are thirsty you need to drink straight away. Even if you are not thirsty, you need to drink regularly. Listen to your body and take action.
Your thirst is a natural gauge for your hydration. If you are thirsty you need to drink straight away. Even if you are not thirsty, you need to drink regularly. Listen to your body and take action.
Dehydration
Dehydration can be one of the "big killers" on the Kokoda Track. There are two main ways that the body can be dehydrated:
- Excess sweating from the high physical exertion levels and the inability to replace those fluids in the body. This could be from simply not drinking enough, or from the body not being able to absorb more liquids than the body is sweating out.
- A stomach bug that results in vomiting and diarrhoea. This can lead to problems by itself, but on top of slight dehydration from the excess exercise - it can be fatal.
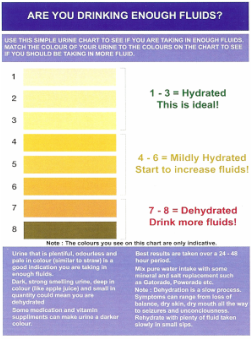
Urine ChartTo assist you in managing your hydration level, you will be given a urine chart that contains information on fluid intake, food intake, hand hygiene and a chart to help determine if you are hydrated.
This small chart should be taken with you on the expedition. Aim to match your sweat rate with fluid intake as closely as possible and ensure that you drink at a rate that is comfortable. This chart will be sent to you a few weeks before the trek begins in a pack along with your snack food. |
Exercise Acquired Hyponatremia (EAH)
Drinking excessive amounts of water can lead to a condition called hyponatremia. Hyponatremia can also result when sodium is lost from the body or when both sodium and fluid are lost from the body, for example, during prolonged sweating and severe vomiting or diarrhoea. Before you read on, our No Roads meals and snacks help you replace any lost sodium, our electrolyte replacement powder supplied for each day, the promotion of the use of hydration bladders which support constant sipping of water, all help to reduce the risk of hyponatremia.
Hyponatremia (severe sodium depletion) has symptoms similar to heat exhaustion and heat stroke and can easily be misdiagnosed. In hyponatremia, as sodium decreases in relation to water, water moves from the cardiovascular system into the intracellular space in the brain, which can result in cerebral edema followed by seizures, coma, and death. Symptoms of hyponatremia that differentiate it from heat exhaustion and heat stroke are decreased thirst, increased urine output and frequency of urination, clarity of urine, lack of poor skin turgor (tenting of the skin), and moist mucous membranes.
Trekkers with hyponatremia may have a significant decrease in level of consciousness, but will not have hot skin or a high core body temperature. Hyponatremia often occurs after the strenuous activity has ceased, while heat exhaustion and heat stroke occur during the activity. Treatment of hyponatremia in the wilderness includes rest, maintaining a stable core body temperature, withholding fluids, and increasing sodium intake (in conscious patients).
Replace Electrolytes when Trekking
|
You need an electrolyte replacement strategy when trekking the Kokoda Track. This strategy should enable you to replace the body salts that are lost through sweating. Electrolytes are to the body as “oil is to a car”.
No Roads Expeditions will supply you with electrolyte replacement tablets. Care needs to be taken. Do not add too much powder as the opposite effect can occur and can lead to dehydration. Follow the directions on the packaging carefully and listen to your guide. Please keep watch on the colour of your urine, as darker urine is a warning sign for dehydration. Headaches are also a warning sign. |
Another solution is to take sachets of electrolyte powder (such as Hydralyte) that can be added to a cup of treated water at the end of each day. During the day straight sterilised water is drunk. The electrolyte powder sachets come in various flavours and can mean a nice flavoured drink at the end of the day’s hike. They are also less weight to carry.
Drag & drop your tab 7 content here
Tents and Huts
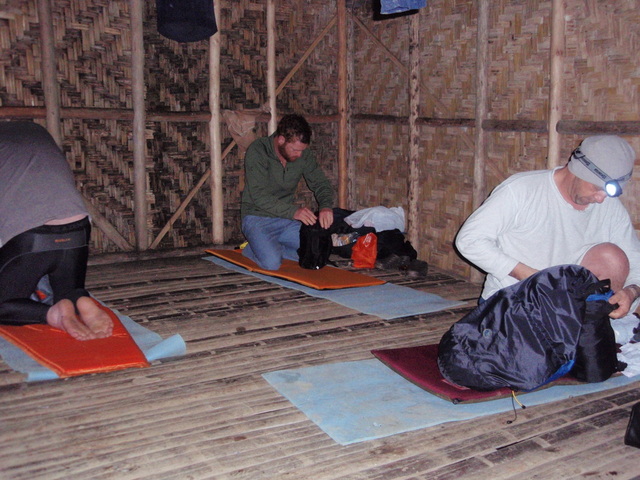
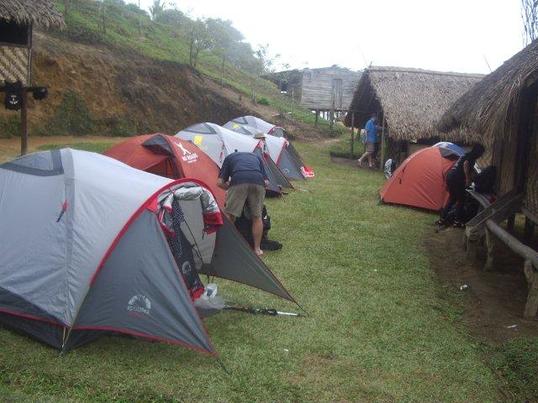
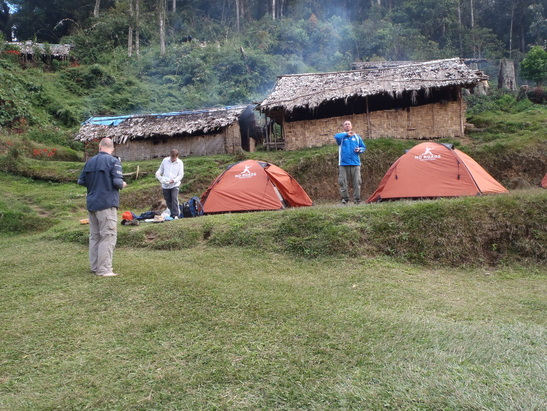
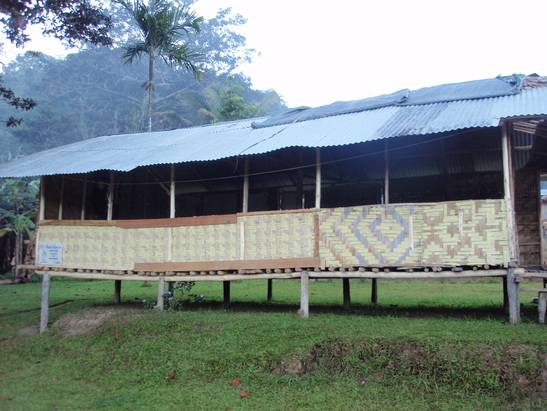
No Roads Expeditions use tents as well as engaging village guest houses along the Track to supply accommodation and some meal components for our trekkers and porters, thus not only reducing the amount of food and equipment carried by the trekking party, but also injecting greater economic benefits into the micro-economies of the village communities along the Track.
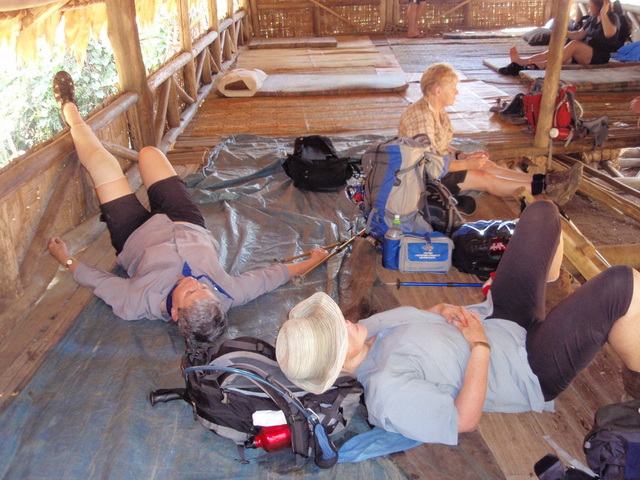
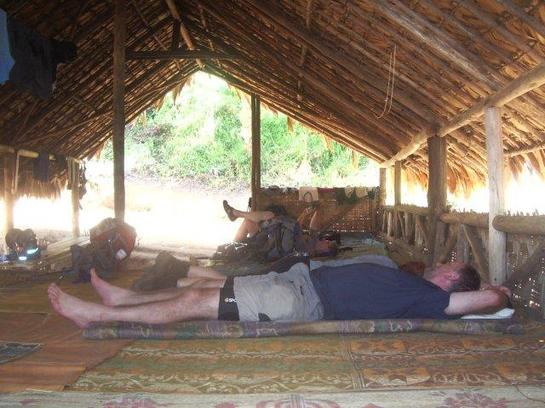
It is up to you each day whether you decide to stay in a guest house or tent. Some trekkers prefer the guest houses with more space whilst others prefer the tents as they are more secure from the bugs at night and offer more privacy.
It is up to you each day whether you decide to stay in a guest house or tent. Some trekkers prefer the guest houses with more space whilst others prefer the tents as they are more secure from the bugs at night and offer more privacy.
Tents
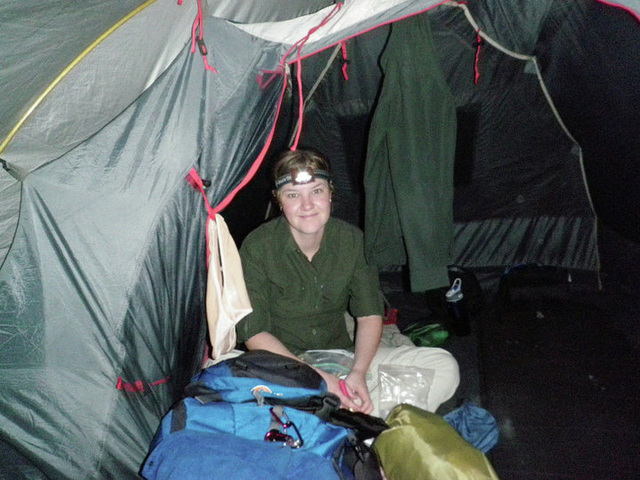
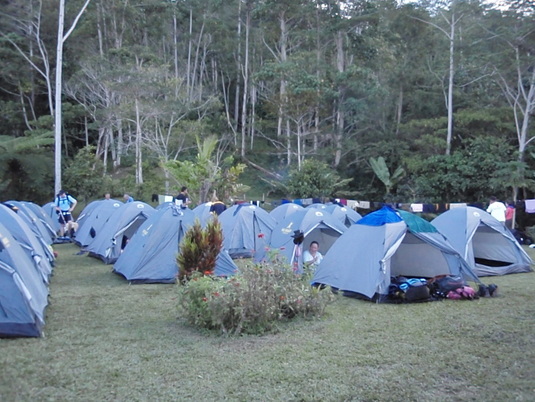
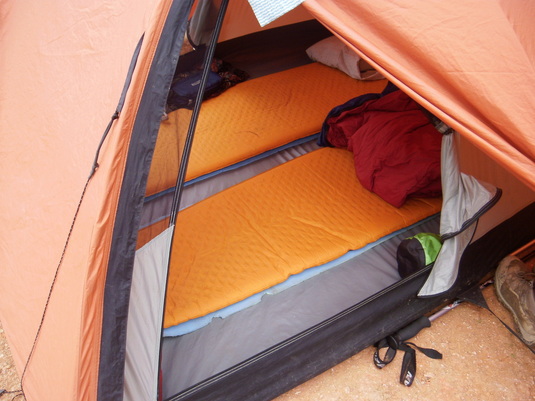
The tents are twin share unless during booking you selected single tent. The tents are carried by the guide team and erected at each camp-site as you arrive. Typically trekkers pair up for the duration of the expedition and use the same numbered tent each night. The 2 person tents have a small annex to store your pack and shoes. Each tent comes with a fly screen door to keep the bugs out at night. In the morning the guides will take down all the tents ready for the days trekking.
Guest Houses
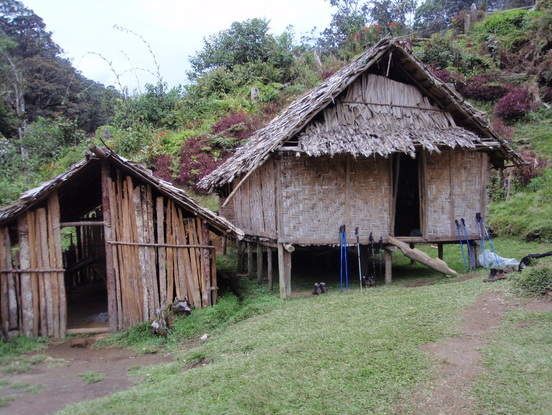
The guest houses are situated in the majority of the camp-sites we stay at. They are available for all trekking companies to hire which does mean we may not always be able to use them if another trekking group has arrived before us.
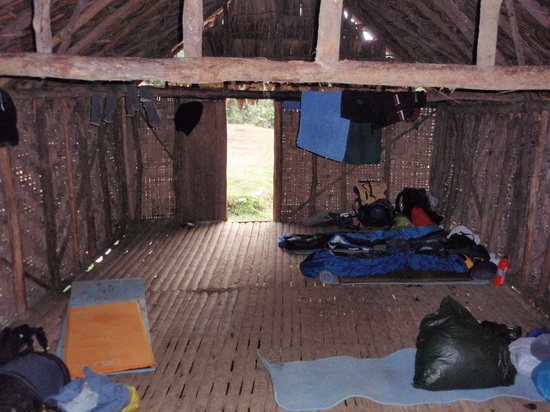
However, No Roads does endeavour to secure them by sending porters ahead each day. These guest houses are very simple. They have a roof, raised floor, walls and windows. There is usually a door and the windows are open with no glass. The roof may leak a little during heavy rain.
However, No Roads does endeavour to secure them by sending porters ahead each day. These guest houses are very simple. They have a roof, raised floor, walls and windows. There is usually a door and the windows are open with no glass. The roof may leak a little during heavy rain.
Campsite Security
At night it is a good idea to bring in all your clothes and boots, backpack, etc.. from outside so that stray dogs do not take off with them. Closing your guest house door and zipping up your tent is also highly recommended. Our porters may collect gear that is left out overnight and keep it secured in their porters hut ready to be returned in the morning.
Theft from tents, huts or backpacks is very rare on the Track. Often missing items turn out to be either misplaced inside backpacks, dropped along the Track somewhere or in someone else's pack.
Theft from tents, huts or backpacks is very rare on the Track. Often missing items turn out to be either misplaced inside backpacks, dropped along the Track somewhere or in someone else's pack.
Guide Team
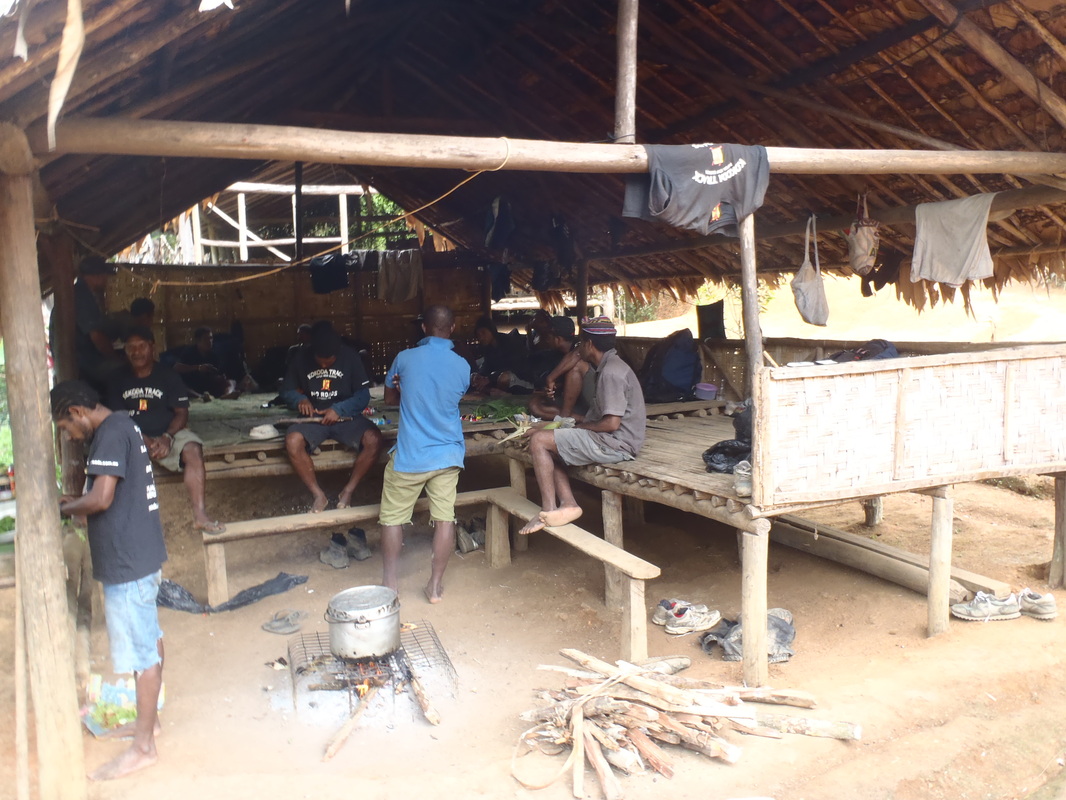
Our PNG guides choose to rest and sleep in their own guest houses as they sometimes feel uncomfortable amongst the trekkers. They like to relax and unwind from a hard days work chatting amongst themselves and singing songs.
Our guides are issued sleeping bags from No Roads but they sometimes prefer to sleep on the floor in the same way they sleep in their home villages.
Our guides are issued sleeping bags from No Roads but they sometimes prefer to sleep on the floor in the same way they sleep in their home villages.
Drag & drop your tab 8 content here
Safe Trekking
|
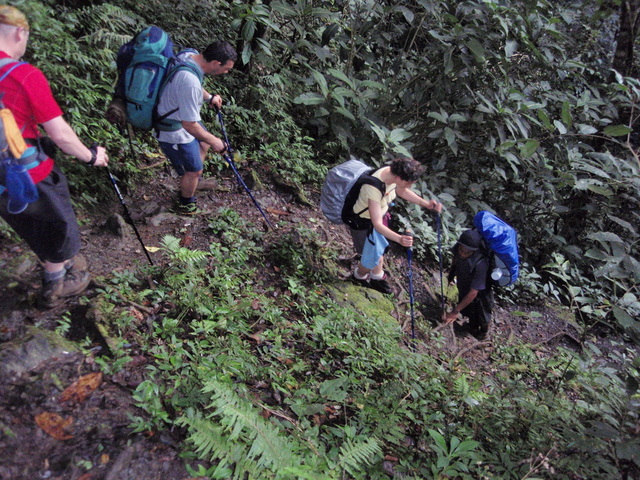
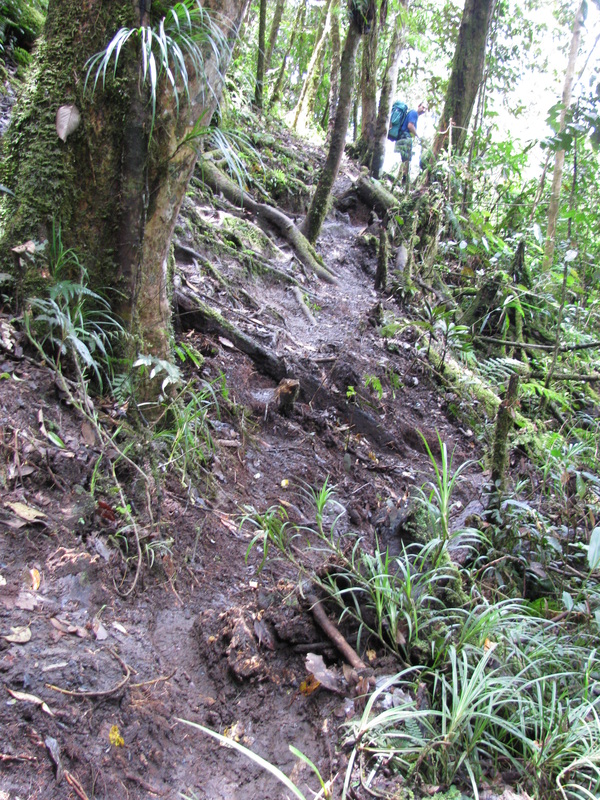
There are many useful techniques and practical advice that will help you trek safely. The Track can be dangerous if you are not careful. Hazards such as tree roots, rocks, slippery muddy paths, water crossings, bank climbs, narrow ridge tracks are just some of the hazards under foot.
The expedition guide and guide team will provide advice along the track, point out hazards, provide you with important tips whilst walking and repeatedly encourage everyone in the expedition to trek safely to avoid evacuations. No Roads avoids trekking at night due to the increased risk of injury. |
The first and most important action you can take is to listen carefully and follow the instructions provided by the expedition guide and the guide team members. Our expedition team are experienced in trekking the Kokoda Track and their advice should be heeded.
The guides will offer their hands to help you along difficult sections of the track and they will carry your packs over water crossings, and magically be there to help you even if you don't ask. They are professionals and very proud of their relatives who helped and carried the wounded during the battles in 1942. Kindly accept their assistance even if you think you can handle the hazard.
The guides will offer their hands to help you along difficult sections of the track and they will carry your packs over water crossings, and magically be there to help you even if you don't ask. They are professionals and very proud of their relatives who helped and carried the wounded during the battles in 1942. Kindly accept their assistance even if you think you can handle the hazard.
Water Safety
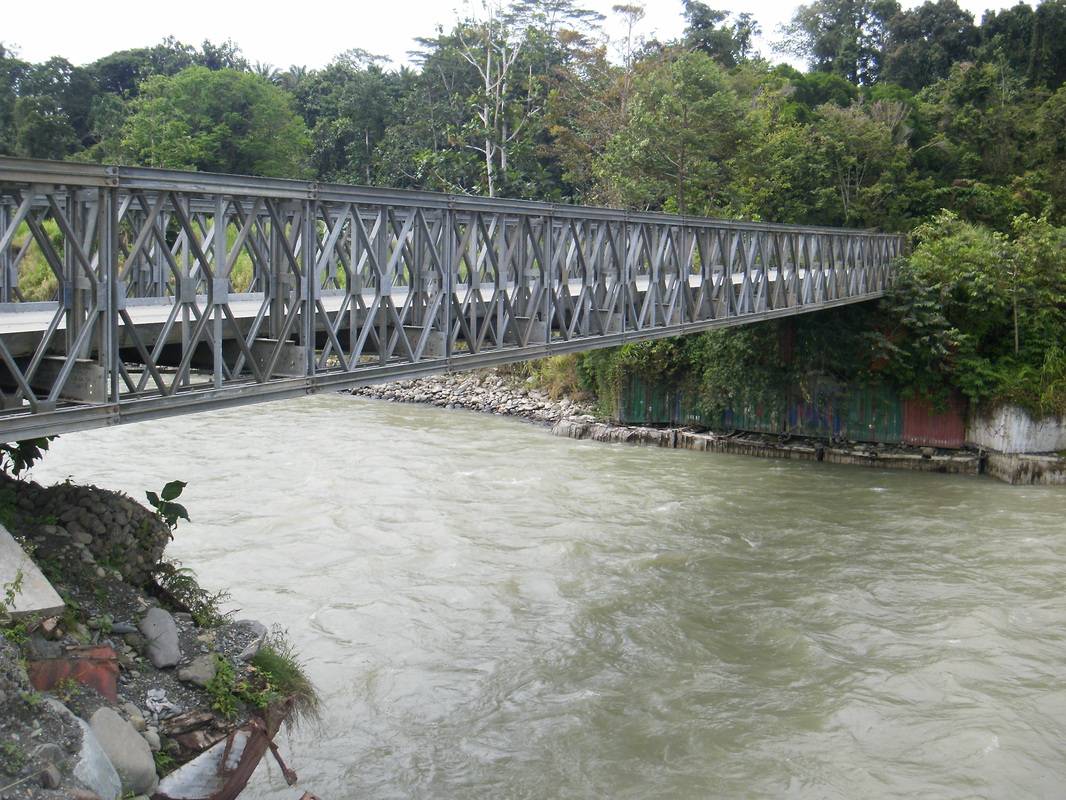
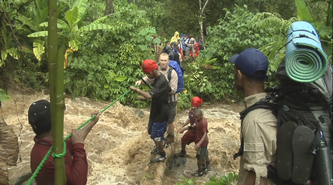
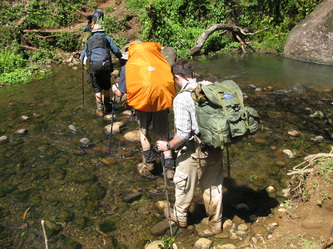
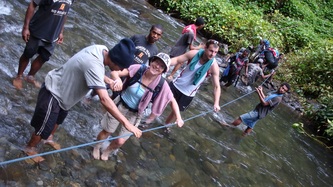
There are many water crossings along the track caused by rivers, creeks, and streams. Water crossings range from walking through small streams, to rock hopping, traversing temporary log bridges made from fallen trees, and in the worst case (after very heavy rainfall) wading through water holding onto ropes. On one of the days you will cross through the same creek 10-12 times walking over rocks in the creek.
No Roads implements a simple risk management policy where everyone follows the same procedure to prevent injuries at water crossings:
- Rope handrails will be rigged on all log bridge crossings and should be used.
- Guides will place a safety line downstream across the water to provide a rescue rope for the unlikely scenario where someone falls in.
- Backpacks and day packs should be removed before crossing and given to the guides to carry over.
- A limit of one trekker per span of bridge at any one time. This reduces the chance of bumping someone off. There may be several guides assisting you though.
- No running, walk slowly at your own pace. Walk with your feet at right angles to the direction you are walking to grip the logs.
- Remain clear of the entry and exit points of the log bridge to allow people to move across the bridge safely.
When crossing creeks without your boots on, be sure to wear reef sandals or sandal-style shoes to avoid cuts and scratches from submerged rocks. This footwear should have toe protection and sturdy straps. Take similar care while bathing in the creeks and streams.
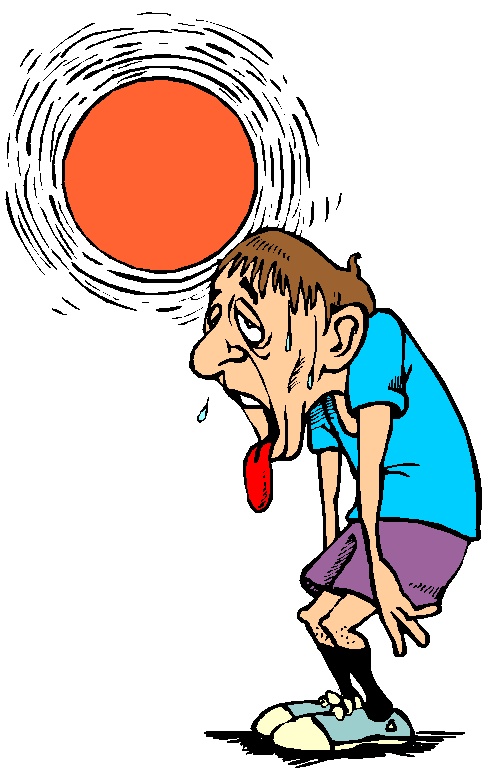
Heat and HumidityHeat-related illness can range from mild conditions such as rash or cramps to very serious conditions such as heat stroke.
Keeping well hydrated and cool is the best way to avoid heat-related illness. The body operates within a core temperature range of about 37-39 degrees Celsius. Normally, the body maintains a healthy core temperature by increasing heat loss through sweating. As the ambient temperature is high and there is high humidity, and you may be starting to dehydrate, your body's ability to regulate its own temperature is impaired and can become 'overheated' easily. |
Some simple strategies to manage the heat and humidity are:
- stay out of the direct sunlight where possible using the shade of the jungle canopy to remain cooler.
- take off your hat when walking out of the sun so your head can cool faster.
- rest in the shade, release your backpack chest strap a little
- ensure you remain hydrated by eating and drinking water
- pace yourself whilst walking and rest when needed
- loosen tight fitting clothing whilst resting
- avoid getting sunburnt
Walking
Walking is the key word. It is not a race and if you rush you may trip or slip and injure yourself. The Track varies in terrain and surface but one thing is consistent, you must focus on where you put your feet, how stable you are, and where to put your next foot.
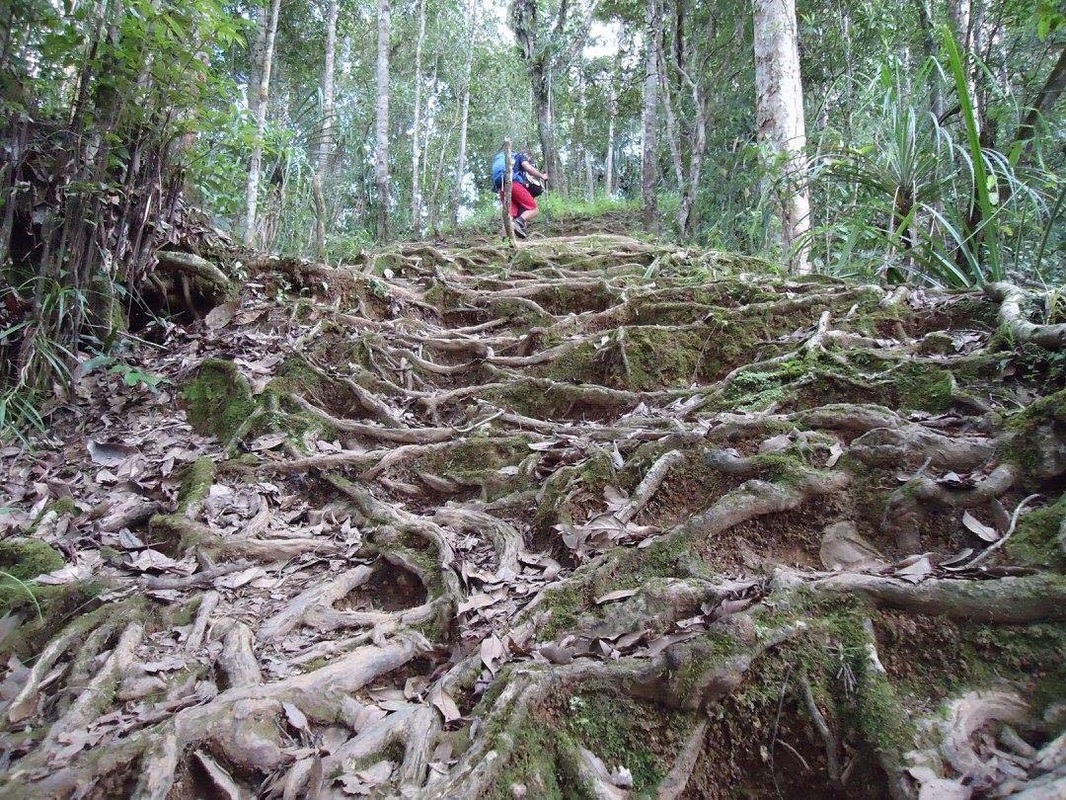
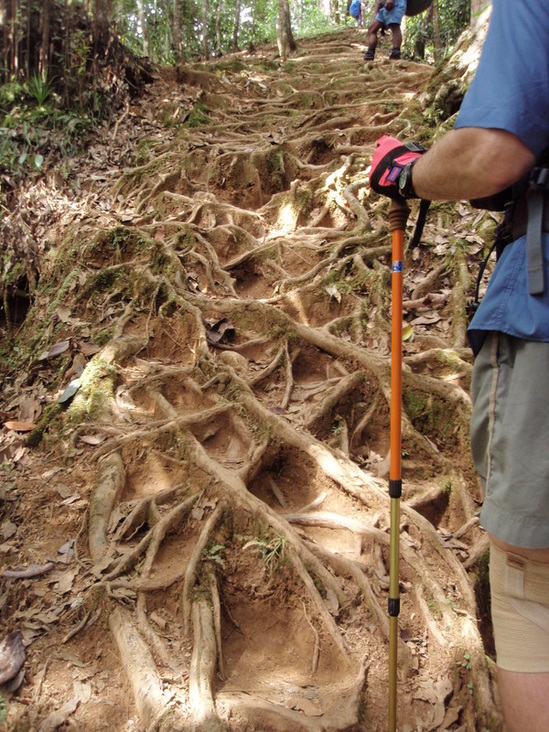
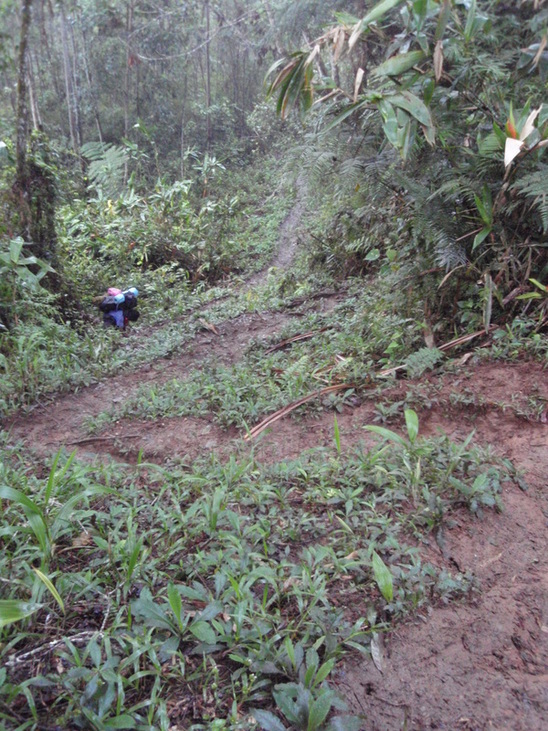
The surface of the track can be very hazardous with deep thick mud, root covered slopes, slippery mud steps, slippery rocks steps, fallen trees to cross over or under, narrow and twisting paths, swampy sections and long narrow paths in hot kunia grass. You will become tired from focusing on where your feet are positioned.
If you have wandered OFF the Track, and are unsure in which direction to get back on the Track, it is better to sit down and stay put until someone locates you. If you keep moving, you may inadvertently keep moving away from the Track, thereby making it harder to find you.
If you are lost ON the Track and unsure of which way to go, again, sit down and wait for your guide or porter to come back for you.
- Walk at your own pace, not that of the lead trekkers.
- Aim for small goals such as the next large tree or next section of track before it flattens for a few metres. Use small steps and focus on breathing.
- Rest when you need to. Stop for a few minutes and then carry on.
- Position your feet on solid surfaces not trying to balance on roots or soft edges.
- Stop and plan out your path through difficult sections.
- Ask for help if needed from a guide.
- Remember to use your trekking poles if you have them.
- Test rocks before moving your entire weight across to them.
- Don't trust every tree or branch as a strong hand hold, test first!
If you have wandered OFF the Track, and are unsure in which direction to get back on the Track, it is better to sit down and stay put until someone locates you. If you keep moving, you may inadvertently keep moving away from the Track, thereby making it harder to find you.
If you are lost ON the Track and unsure of which way to go, again, sit down and wait for your guide or porter to come back for you.
|
|
|
Spacing Between Trekkers
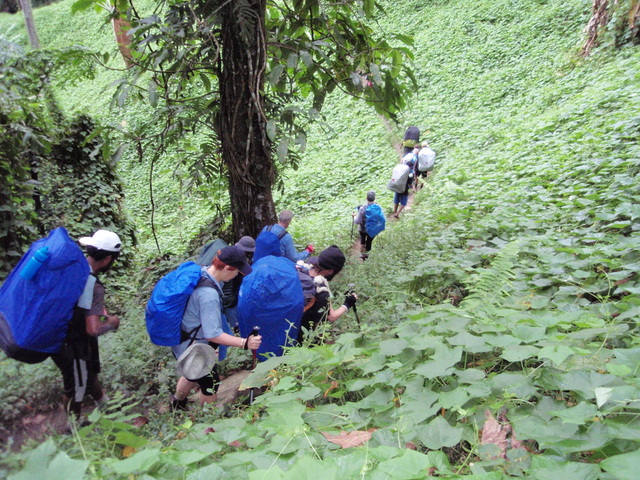
Try to keep the spacing between yourself and the trekker in front of you to at least a few meters. This allows for the trekking poles of the trekker in front of you to move without spiking you and ensures you can stop in time if they stop suddenly without potentially bumping into them. This becomes a more serious concern when climbing down a steep section or over an object where overbalancing is unsafe.
To ensure the entire expedition arrives safely at the campsite each afternoon, follow these general rules:
To ensure the entire expedition arrives safely at the campsite each afternoon, follow these general rules:
- stay on the track
- keep within sight of the trekkers in front and behind you (helps avoids losing someone over an edge or taking the wrong path)
- stay behind the lead porter at the front
Walking in the Dark
No Roads will always try to avoid walking in the dark.
Walking in the dark is more dangerous so our expedition teams aim to reach camp before dusk and to leave early after first light in the morning.
Walking in the dark is more dangerous so our expedition teams aim to reach camp before dusk and to leave early after first light in the morning.
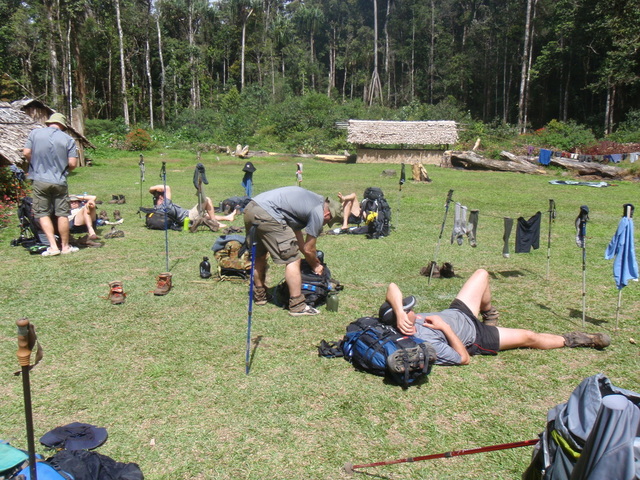
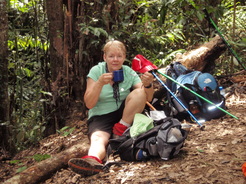
Rest BreaksThe expedition team will stop and rest many times throughout the day to have meals and regroup. In addition to these standard rest stops, you MUST rest if you feel you need to. It is not a race.
Taking a short five minute break, taking your pack off, sitting in the shade and having a good drink of water and snack on some energy food makes the world of difference on the difficult sections. |
At the longer rest breaks during the day such as for lunch, it is a good idea to take your boots off and put on your sandals to allow your feet to dry off and relax.
Bombs, Grenades, Ammunition, Weapons
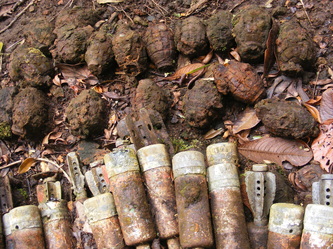
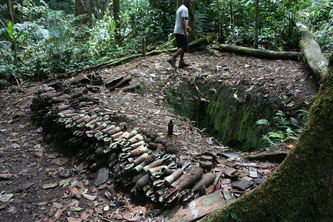
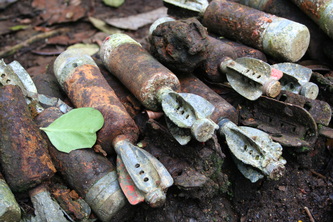
Walking along the Kokoda Track is like walking though a living museum with much of the battle sites left as they were during the war. The areas around the track are littered with unexploded ordnance that are increasingly more unstable as the years go by. The Australian Defence Force has made efforts to either remove or disable obviously dangerous items but new ones are unearthed all the time by the weather and locals.
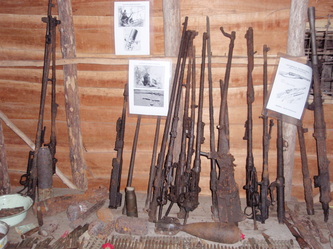
The war museums created by the local villagers contain interesting collections of battle equipment such as helmets, boots, weapons, grenades and ammunition. Even these items may be dangerous as they may not have been checked by experts and simply collected by local kids who don't know any better.
The war museums created by the local villagers contain interesting collections of battle equipment such as helmets, boots, weapons, grenades and ammunition. Even these items may be dangerous as they may not have been checked by experts and simply collected by local kids who don't know any better.
As curious as you may be, this is a serious issue as some locals have been injured by unstable ordnance and lost hands and feet. For your own safety and that of your expedition team members, please follow the following basic rules:
- Do not pick-up anything that looks like it has been left over from the war.
- Do not handle any war relics, even in museums.
- Do not jump into weapon pits unless they have been checked by the expedition guide first.
- Be very careful if you need to venture off the track for a toilet break and watch where you walk.
War Relic Removal
It is illegal under PNG and Australian law to remove any war relics from the Track.
Not only is it unethical to remove any relics from the Kokoda Track or its surrounds, it devalues the environment and the experience for others. KTA Rangers police this on the Track. If you see someone taking relics please report this to the KTA Rangers or your guide.
Not only is it unethical to remove any relics from the Kokoda Track or its surrounds, it devalues the environment and the experience for others. KTA Rangers police this on the Track. If you see someone taking relics please report this to the KTA Rangers or your guide.
Drag & drop your tab 9 content here
First Aid and Blisters
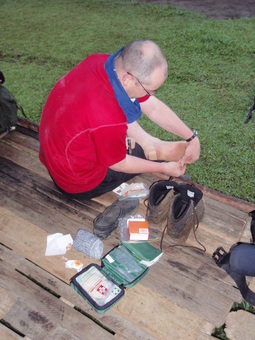
The expedition guide will always provide emergency first aid when needed. Minor injuries such as scratches, chaffing, blisters, sores etc.. should be dealt by the trekker with using basic first aid techniques. Spending time now learning about how to look after yourself using your own personal first aid kit will help you immensely in the jungle. The better prepared you are the more enjoyable it will be.
Keep your personal first aid kit accessible in your pack, perhaps in one of the outer pockets so you can access it easily during a break on the side of the track. If it is buried deep in your pack you might think twice about finding it which is not good.
Trekkers suffering from serious injuries will attempt to be evacuated, usually by a combination of jungle stretcher and helicopter.
Beginning in 2012, all Australian led Kokoda No Roads expeditions will include an Automatic External Defibrillator (AED) carried by your Australian Expedition Guide.
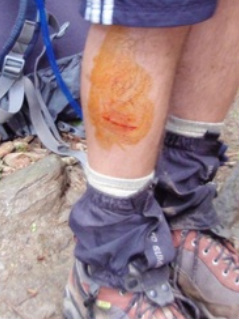
Cuts and AbrasionsBasic first aid includes knowing how to deal with minor cuts and abrasions. In the hot, humid and jungle environment it is very important to deal with wounds before they get worse and become infected.
The key is keeping the wound clean. If bleeding is controlled, the wound should be thoroughly washed. Although sterile saline is best for irrigating wounds (rinsing them out), the next best solution is to clean the wound from a fresh water source (preferably clean water from a water bottle). The more water you use, the better. Remove as much of the visible dirt as possible. When you have cleaned the wound, dressing the wound will keep further contamination from entering the wound. Sterile gauze is best. Change the dressing at least once a day and every time the area is heavily contaminated. Use an antibiotic ointment and apply directly to the wound. Use of antibiotic pills should be reserved for treatment of actual wound infections – not for the prevention of infection.
|
ChafingChafing is a potentially serious problem in the moist jungle environment
of Papua New Guinea, leading to bleeding, skin infections and extreme
discomfort.
Salt when you sweat can gather in your clothing, often around the edges of your shorts, and dries the clothing hard. This can cause chafing between the legs and once it starts it gets painful. Change the clothing and rinse at camp under water. Women sometimes suffer chafing under their arms and breasts. Careful, early attention should be given to any areas that appear to be chafing with liberal use of barrier ointments like Bepanthen or Paw Paw cream. Infected chafing areas may require antibiotic therapy. |
You may need to apply the cream more than once per day, especially when it has been raining heavily all day.
Consider wearing a pair of short tights, such as Skins or bike pants to help prevent rubbing against your skin. There are many brands and sizes available now.
Consider wearing a pair of short tights, such as Skins or bike pants to help prevent rubbing against your skin. There are many brands and sizes available now.
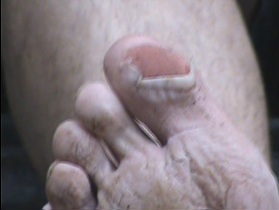
Looking After Your FeetA common sight around camp each day is trekkers with their first aid kits out, dealing with foot, toe or ankle injuries. Hopefully, you will not get any if you prepare well and train in your shoes and socks for several months to ensure they are worn in and fitting properly.
Nevertheless, you should know how to deal with minor injuries to your feet, ankles and other basic first aid treatments. Even people who do not normally get blisters may suffer foot problems due to the damp and steep conditions. The No Roads expedition guide is trained in wilderness first aid and can provide some advice, but it is better that you know what works best for you and fix it. |
You should know how to do the following basic first aid techniques which are documented in most First Aid handbooks:
- strapping your ankle or knee
- blister management (both as one is forming and after one has formed)
- cleaning and dressing cuts and scratches
- applying antiseptic cream or powders
- applying basic wound dressings (band-aids etc.)
Friction Blisters
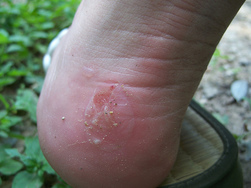
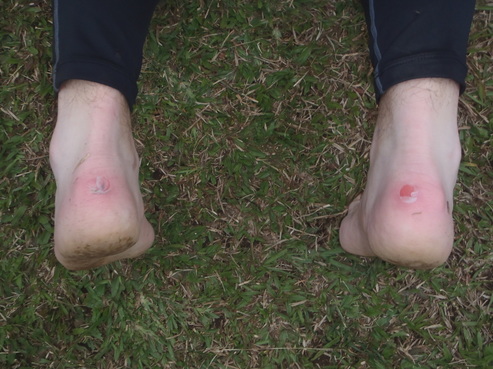
A friction blister is usually caused by irritation from continuous rubbing or pressure, typically on your feet where your footwear rubs such as on the back of your ankle, toes and sides of your foot.
One warning sign that a blister is about to develop is redness and warmth on the skin called a "hot spot." Next, fluid fills the space between the top two layers of skin to provide protection from continued rubbing. When this happens you will see a blister that looks like a little bubble on the skin.
If you have any "hot spots" during trekking, it's important to treat them right away to prevent the blister from developing. Try to keep your feet dry or change socks if possible and allowing your feet to dry whenever possible.
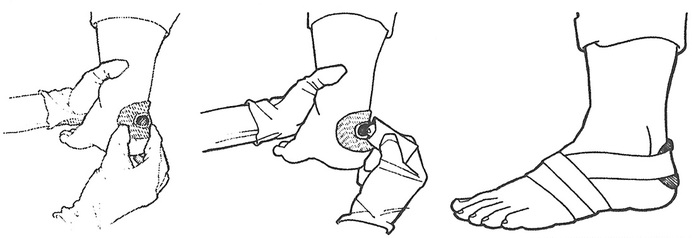
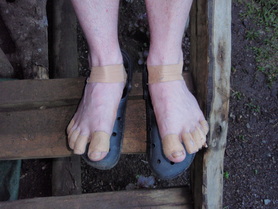
Another treatment option is to apply a 2nd skin dressing or moleskin and tape the sensitive area.
Suggestions for a blister kit for your first aid kit can be found here: external website
How to Prevent Blisters Using Taping
There is no single right way to tape your feet - only the right way for you. If you're not happy with your taping techniques, give these a go and see if they offer you anything above your current technique. These videos are thanks to Rebecca Rushton from Blister Prevention.
|
Blister taping for your toes
|
Blister taping for the balls of your foot
|
Blister taping for heels
|
How to Treat a Blister
If you do get a blister, the goal is to keep the blister from getting bigger and avoiding infection. Signs of infection include pus draining from the blister, very red or warm skin around the blister, and red streaks leading away from the blister).
Small unbroken blisters that don't cause discomfort can be left alone to heal, because the best protection against infection is a blister's own skin. However, large, painful blisters can be drained as long as you keep the top layer of skin intact and covering the blister.
Small unbroken blisters that don't cause discomfort can be left alone to heal, because the best protection against infection is a blister's own skin. However, large, painful blisters can be drained as long as you keep the top layer of skin intact and covering the blister.
Wash your hands using the anti-septic hand-wash, and put on your protective latex type gloves from your first aid kit.
To safely drain a blister, first clean the blister and the surrounding area with rubbing alcohol or antibiotic soap and water. Next, sterilise a needle and puncture a very small hole at the edge of the blister and drain the fluid by applying gentle pressure. Once drained, place antibiotic ointment on the blister and cover with a bandage and let it heal naturally.
Prevention of blisters can be achieved applying hydrocolloid pad dressings (eg Dr Scholl, Spenco) to pressure areas. These often come off in extreme moisture and require an elastoplast dressing over the top to remain in place. The common pressure areas are the side of the big toe and the ball of the foot, but obviously this varies and individuals should become familiar with their particular pressure areas during training.
If a blister has excessive amounts of pus draining from it, starts to smell, or becomes red, the blister is probably infected and will need further attention. Antibiotics may be required if the blisters become infected with bacteria. Ask your expedition guide for advice.
First Aid Information
St John fact sheets are a guide to basic first aid procedures - fact sheets online - weblink
Drag & drop content here

