Equipment and Trek Gear Selection
|
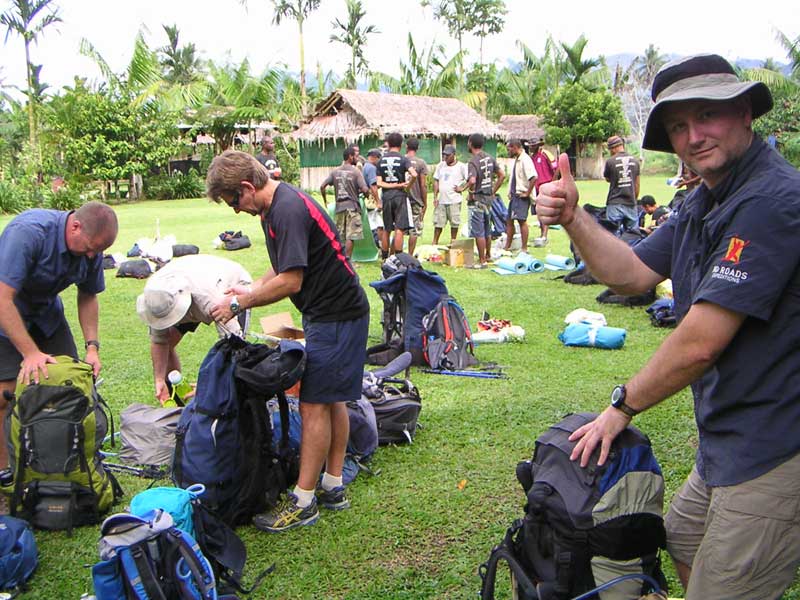
"What do I need to bring?" is one of the most popular questions raised during preparation meetings. If you haven't trekked before, or been overseas even, it can seem very daunting not knowing what you need, or if what you have bought is enough gear. If you are a seasoned trekker this section will also assist you in selecting the correct gear you need for this trek in the Kokoda environment.
The good news is that No Roads has led 1000s of trekkers along the Kokoda Track so we understand what you need to take, especially what is important and what is essential. Trekking along the Kokoda Track does not require you to bring specialist or technical equipment. No Roads Expeditions will bring all the essential expedition equipment used by the group including the tents, cooking equipment, safety ropes, satellite phones etc.. All you will need is some basic personal equipment for yourself. |
Justin Kibell - Expedition Guide
|
Having the correct footwear, sleeping bag, clothing and backpack make up most of the essential equipment. The only additional equipment of note would be: Hydration bladder, Water bottle(s), Trekking poles, Water purification, Sun screen, and Insect repellent.
Most major cities or towns now have large outdoor activities stores that sell a wide range of equipment. Whilst you don't need the most expensive top of the range gear, ensure the quality of lower priced items is good (ask the store staff) as the last thing you want is for your gear to fail on you.
Most major cities or towns now have large outdoor activities stores that sell a wide range of equipment. Whilst you don't need the most expensive top of the range gear, ensure the quality of lower priced items is good (ask the store staff) as the last thing you want is for your gear to fail on you.
Arrows may not center when in edit mode. Once site is published, the arrow will be centered on the tab
When the site is published, this border and note will not show up.
Drag & drop your tab 1 content here
Gear Checklists
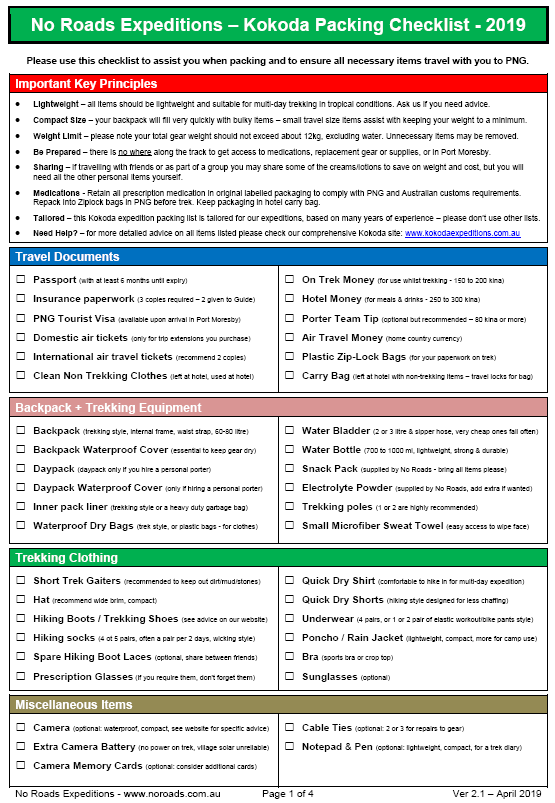
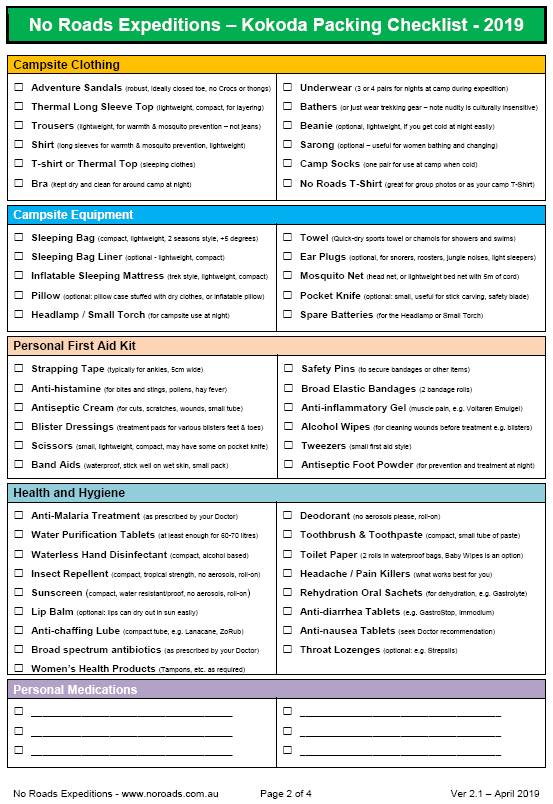
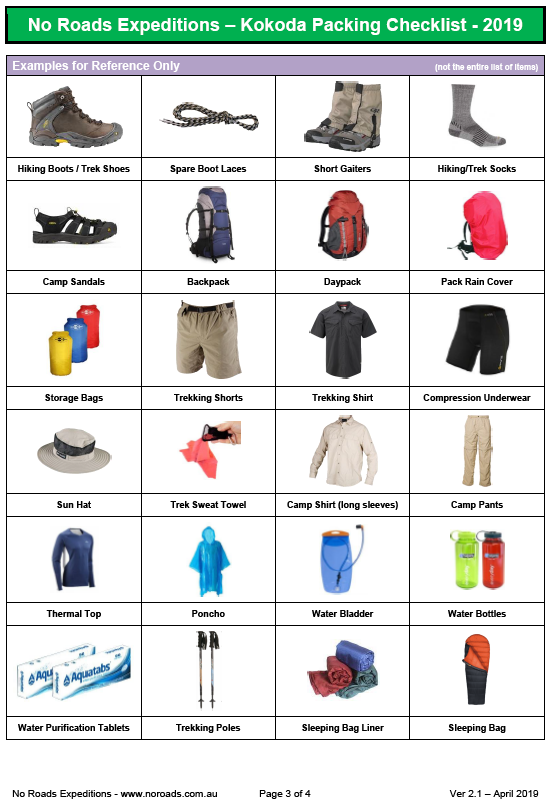
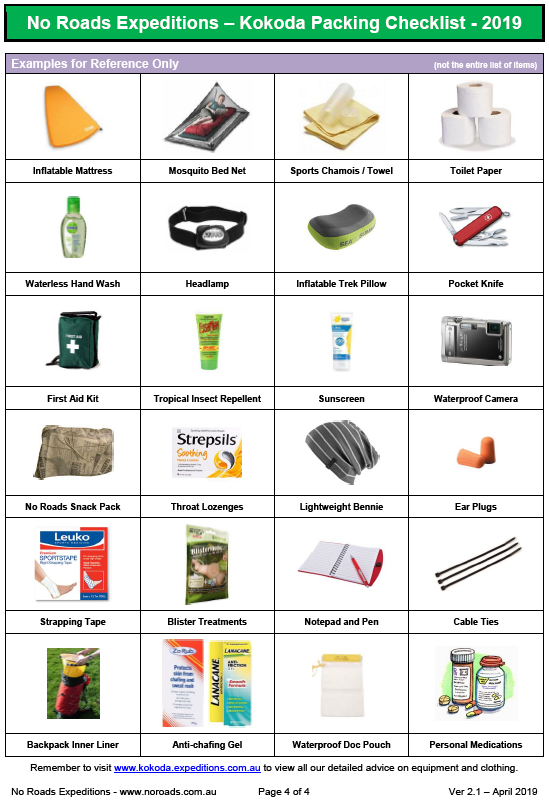
The following four page checklist provides you with a list of all equipment necessary for our Kokoda Track expeditions. Please use this checklist to help ensure you have acquired all the necessary equipment and use it later as a final packing checklist before heading off for your trek.
|
Normal Kokoda Checklist
|
Fast Kokoda Checklist
| ||||||||||||
Three very important points should help ensure you don't pack too much:
- If you are carrying your own full backpack, every extra item adds weight and in next to no time you will have too much. Packs weighing more than 12kg are carrying too much!
- You are part of an expedition in which a team of very capable people carry all the food, tents, camping equipment etc.. for you, so you don't need any of that gear at all. Don't use gear lists from other companies as they are not suitable for our expeditions.
- Unless you are planning to take up trekking or bush‐walking as a hobby, consider if you really want to spend big $$$ on a lot of gear that you will be using once on this expedition?
Our gear checklist reflects observations and feedback from thousands of trekkers and our Expedition Guides for over ten years of leading expeditions along the Kokoda Track.
What Not to Bring!
Items such as a GPS, satellite phones, survival kits, stretchers, flares, detailed maps, survival shelters, powerful torches, etc. are NOT required by trekkers as they are either carried by the expedition guide, porter team or simply just not required at all.
A few trekkers have come along prepared for everything and subsequently found their extra equipment weight an unnecessary burden! Guides will check your gear at the Hotel on the first night to discuss unnecessary items and how they will impact the expedition.
Please refrain from bringing alcohol, heavy food items, excessive cash (e.g. more than 200 Kina), balloons, sweets or trinkets for the local children (see our "gifts for locals" page).
Drag & drop your tab 2 content here
Footwear
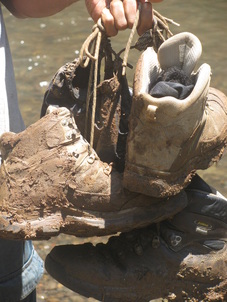
Good quality well fitting footwear a must!
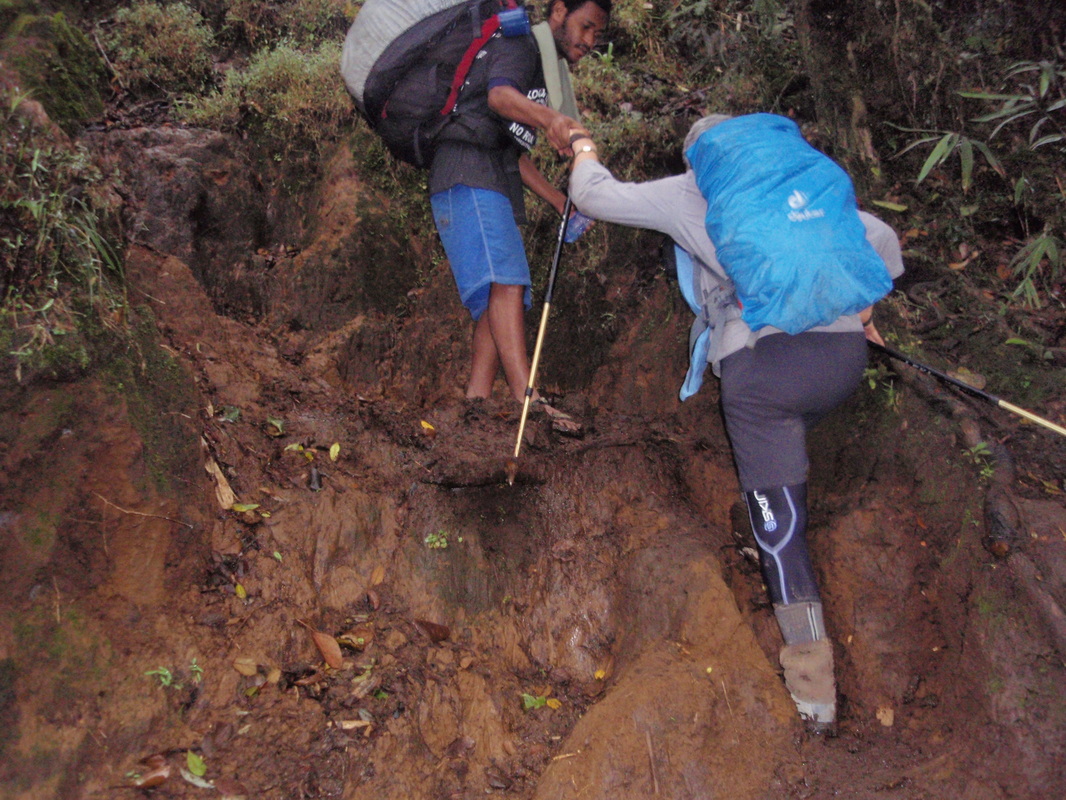
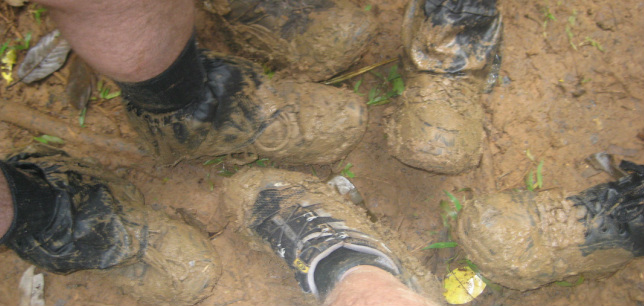
Your feet will be walking for long periods over eight days in hot and humid conditions, over rough terrain in mud and water, so the correct footwear is essential for both trekking and relaxing around the campsite.
Look after your feet and they will help you up every ridge and down every decline with ease. Ignore them and these activities will be an absolute nightmare.
Trekking with the wrong type or poorly fitting boots may lead to:
Look after your feet and they will help you up every ridge and down every decline with ease. Ignore them and these activities will be an absolute nightmare.
Trekking with the wrong type or poorly fitting boots may lead to:
- ankle injuries - twisted or sprained ankles
- increased rise of slipping, tripping and falling over
- blister development
- sore feet - sole of feet bruised, painful pressure spots
- inability to trek - feet so badly injured you may need to be evacuated
Poorly fitted hiking boots or adventure style shoes is like putting square wheels on a car and asking it to drive fast for days on end. Not a good idea of course!
Key Points
If you are buying a pair of boots or shoes for the first time, utilise the experience of the sales staff to properly fit your footwear. Tell them where you are going. Don't rush, wear the socks you plan to take and try on many different brands and styles. They must fit well, not just okay.
Key properties for trekking footwear on the Kokoda Track are:
You have several footwear options to consider:
Key properties for trekking footwear on the Kokoda Track are:
- strong sole to protect against tree roots and sharp rocks with a good tread pattern
- not too heavy
- good ankle support
- ability to let your feet breath in the hot/humid conditions - synthetic uppers are usually made from cordura and suede, are lighter and more breathable than full leather or full Gore-Tex.
- ability to lace your feet tightly into the shoe/boot so they don't move around
- being super water-proof is not as important
You have several footwear options to consider:
- Walking Shoes / Adventure Runners style
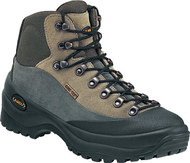
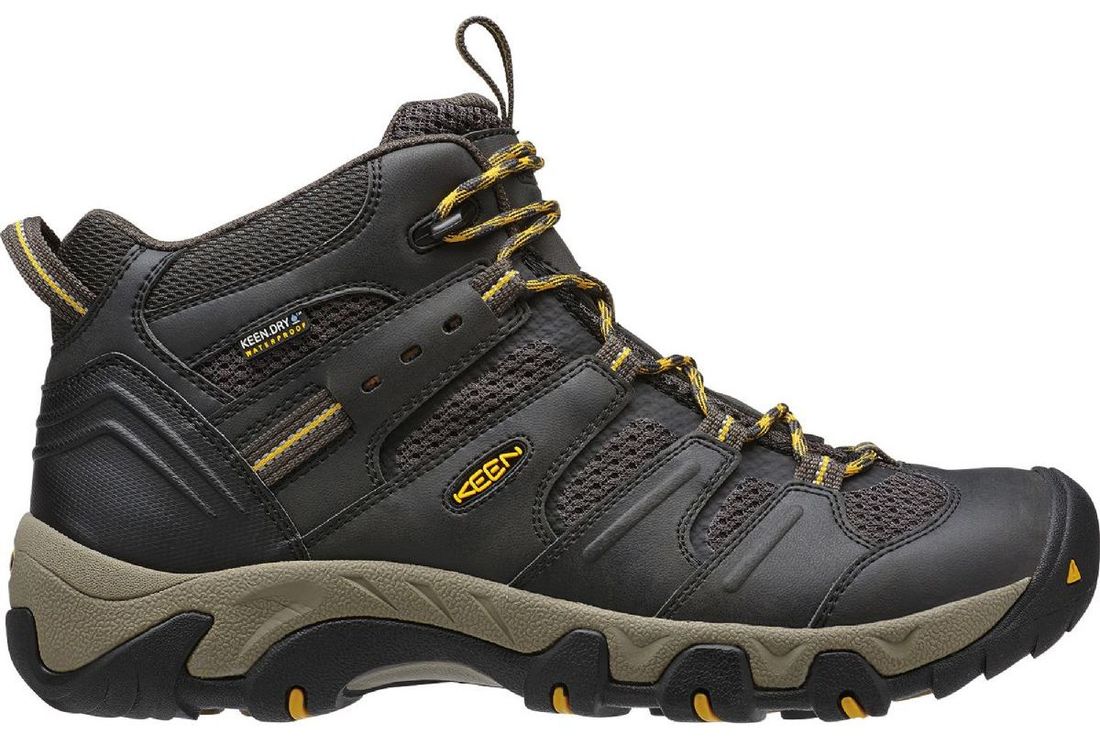
- Lightweight Hiking Boots
- Mountaineering Style Boots
- Camp Footwear - Sandals
Buy your trekking socks first, get them and bring them with you whilst trying on boots. Shops often have socks to use when trying on boots, but it is best to use your own socks and use the ones you will be trekking with.
Wearing In your Footwear
You must wear in your boots before you trek along the Kokoda Track. Typically this will require you to be training in your boots up to three months before you leave. Not wearing in your boots typically results in discomfort and blisters on your expedition.
The process of breaking in hiking boots is about softening the materials enough that they don't rub or bother your feet. For that reason, lighter hiking boots will require less breaking in than heavy boots, and leather hiking boots will take a particularly long time to break in.
When breaking the boots in, wear the socks that you would wear on the trek. This ensures your foot molds to the shoe more accurately. Break in new boots slowly with short, quick hikes.
Your expedition guide will hear alarm bells and begin to look pale and stressed if you turn up with shiny, brand new boots and say "These boots are awesome, I just got them last week and cannot wait to use them." - true story!!
Walking Shoes / Adventure Runners
The first thing a good shoe should be is comfortable. Usually if they are not comfortable in the shop they won't be comfortable in the bush. If you are carrying a heavy backpack for multiple days we recommend you look at lightweight boots vs a walking shoe.
Considerations with an adventure style shoe solution:
Considerations with an adventure style shoe solution:
- good ankle support
- good sole grip for muddy conditions
- ability to support your feet over multiple days of use
- strong sole to support walking over rocks and tree roots
Boots
While mountaineering style boots are an option it is one we don't recommend unless you are a seasoned trekker. They don't tend to allow your feet to breath as well in the hot and humid climate and can be heavier (1200+ grams each) than the lighter weight boots available now (500-900 grams each).
Lightweight Hiking Boots
A good pair of lightweight hiking boots or shoes will protect your feet from roots and stones, support your ankles, and ensure your feet can breathe and don't develop blisters.
There are many on this style of boot the market now designed for people doing trips like Kokoda. These boots are typically available in the major outdoors shops like Anaconda, Kathmandu, Rays Outdoors, Paddy Pallin, Bogong Outdoors, Mountain Designs, Snowgum etc..
Do you have wide or narrow feet? Hiking boots come in all shapes and sizes but some are more suited to people with wider feet, and others for narrower feet. You should ask the sales person assisting you about which brand and style suit your feet.
Hire Boots
Hire boots, while generally functional, do not get to know your feet very well and in turn your feet don't get a chance to get to know the boots. You will need at least two-three months of walking "in" your boots and a hire boot just doesn't give you that luxury.
We do not recommend hire boots.
We do not recommend hire boots.
Lacing your Boots for the Hills
|
The technique described in this short video highlights the need to ensure your heels do not slide around in your boots. You spend a lot of time going up and down hills and blisters form quickly if your feet move around in your boots - sliding forward into your toes, backwards into your heal.
When you are doing up the laces in your boots tie the lower half off first and then the top section to lock your heel into the back of your boots. This stops your foot sliding forward a lot on the downhill sections and a really easy tip that will help prevent painful blisters. |
|
Gaiters or Over Shoe Protectors
|
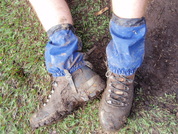
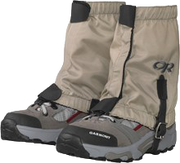
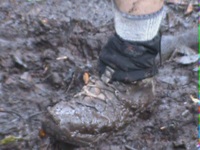
As you walk along the Kokoda Track you can easily get mud, pebbles, sticks, grit and other items into your boots. These small items begin to rub and cause hot spots that soon turn into blisters! The aim is to prevent this with gaiters.
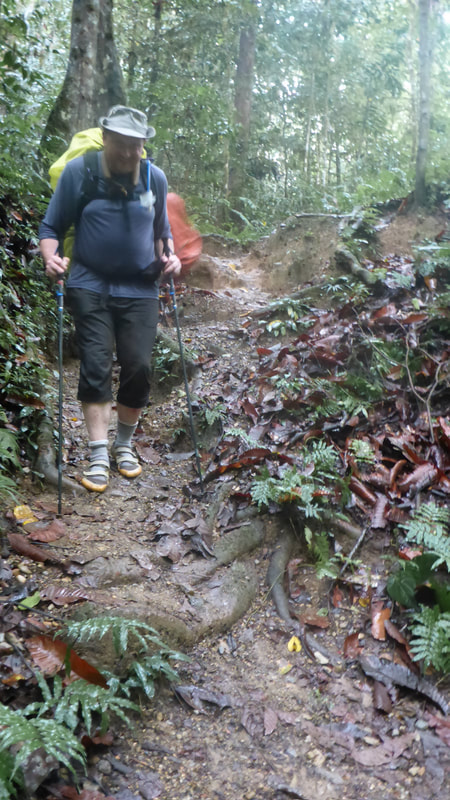
Gaiters help prevent these foreign objects getting into your boots and are an absolute must. Full sized gaiters (up to knees) can be used but your lower legs will heat up in the hot and humid temperatures. Heavy canvas style gaiters are not necessary as you are not pushing through virgin scrub. Many trekkers use smaller sets of gaiters that cover the top of the shoe and up to the top of your socks. They are typically secured in place by a hook at the front onto your boot laces, an elastic strap around your leg at the top and an adjustable strap under your boot to secure them.
Cheap gardening type ankle gaiters without under-foot straps can stop working correctly as the material isn't secured. You may run the risk of mud, sticks and stones still getting into your boots. |
Socks
|
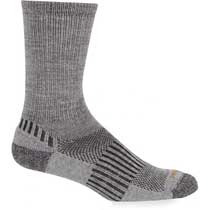
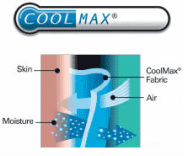
Your socks are very important, just like your footwear. Most people who purchase good quality trekking/hiking socks that are designed to be worn in boots/shoes for long periods of time have no problems. For Kokoda conditions, they are better if they are designed to wick away sweat from your foot, lightweight (i.e. not designed for super cold conditions) and stay up above your ankles without falling.
Cheap all purpose "explorer" type socks are not recommended for a multi-day expedition like Kokdoa. You are better off going to an outdoors shop and asking for advice from the salesperson on trekking/hiking socks. You will probably need about 4 to 5 pairs for the entire expedition. Word of Caution: There are lots of stories going around by well meaning people that tell of putting all sorts of different lotions and oils over your feet to toughen them up, etc. etc. - maybe that works for them but you MUST find out what works for you! If you are not in the Army, and don't go trekking each weekend, or you are not a sock guru, then don't take their word for it unless you have tried it!! |
Wear your socks in at the same time you 'wear in' your boots/shoes. Find out how they feel on a really hot day after walking for several hours. Are they bunching up inside your shoes? They will get wet, dirty and smelly in Kokoda. You can rinse them off in the creeks/under taps each night so three to four pairs is typically a good number to take.
Two Socks - Liner and Thicker Outer Sock
If you plan to wear two pairs of socks please make sure they are designed to be worn as a pair. Usually the inner sock is a thinner style and the outer one thicker. The two combined work well to wick sweat away from the base of your feet and help prevent blisters if fitted and worn correctly.
Drying your Boots
On the Track your footwear will get wet. They will end up wet from your sweat, rain and from walking through small water crossings. At any stage we recommend you stop and empty out any water that may have built up inside your boots.
At night it is NOT recommended to dry your boots around a camp fire for two reasons:
At night it is NOT recommended to dry your boots around a camp fire for two reasons:
- The boots do not dry evenly and some of the materials need to air dry properly.
- Secondly, they can easily get burnt or damaged by the fire, even if it is accidental. They are a critical piece of trekking equipment for your feet so don't risk it.
Camp Footwear
At all times when you are not trekking, such as at camp in the morning or afternoon/evening, and during the lunch break, you should allow your feet to breath and recover from being stuck in hiking boots all day.
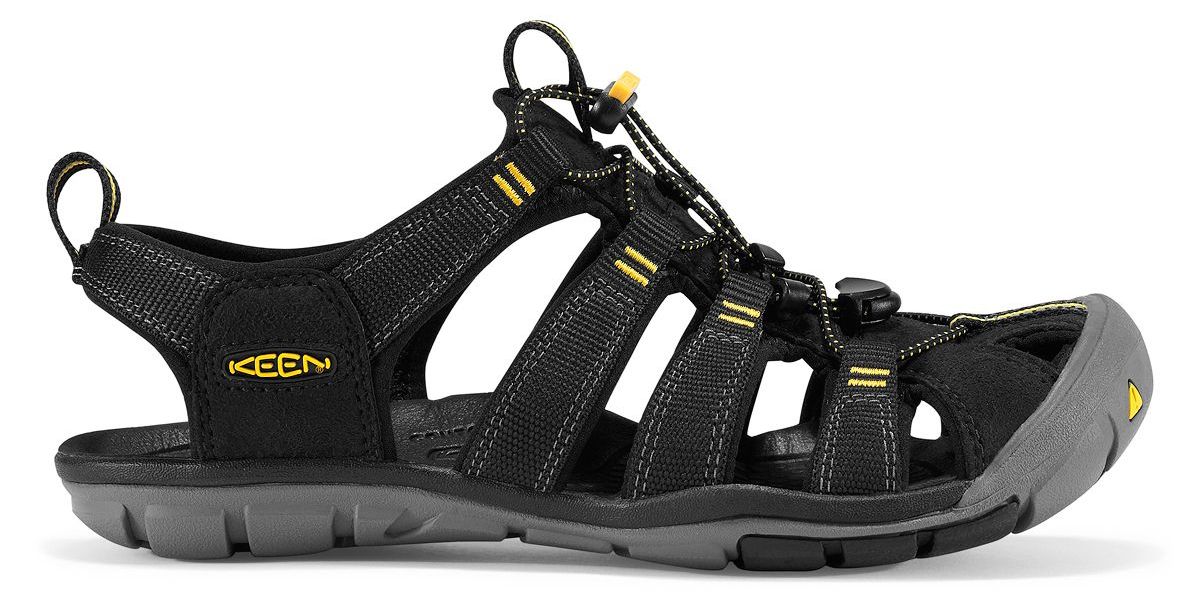
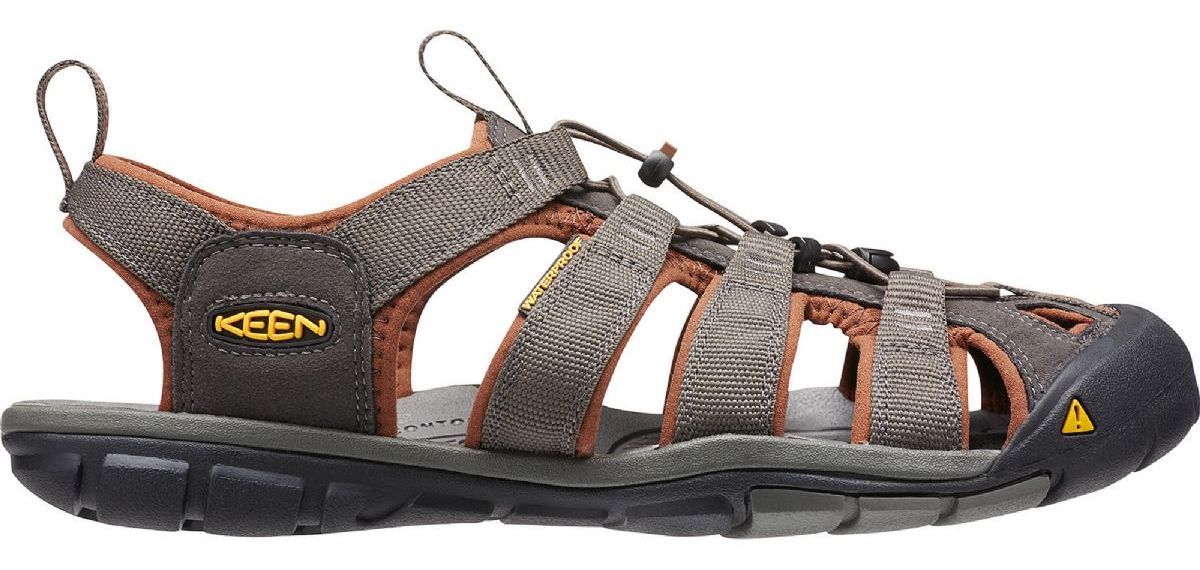
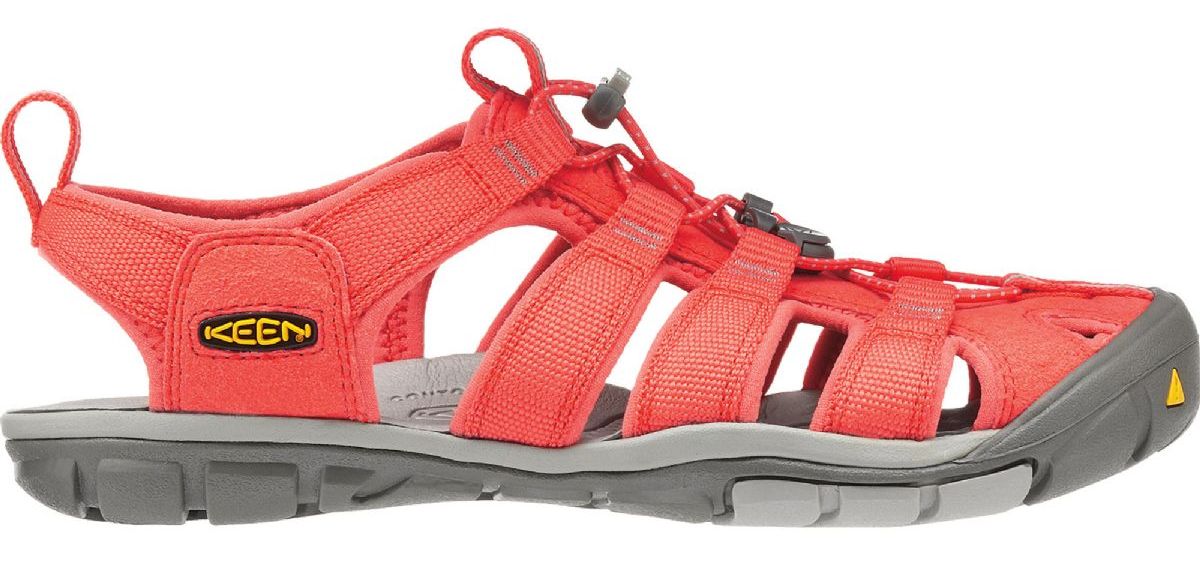
At camp, it is important that you don't ruin your trek by hurting your feet stepping on something sharp or getting bitten by an insect. This is why we should all wear camp sandals of some sort all the time.
Get yourselves some lightweight sandals that secure well on your feet, have a strong sole and have toe protection, but allow your feet to air out.
Some trekkers will wear these types of sandals in the river crossings hence the requirement for toe protection and a secure fitting so they don't float off and away.
Thongs or Crocs are not recommended - too many bad stories from people who wore them and either injured their feet or they broke and had nothing to wear!
Thongs or Crocs are not recommended - too many bad stories from people who wore them and either injured their feet or they broke and had nothing to wear!
Drag & drop your tab 3 content here
Backpack
|
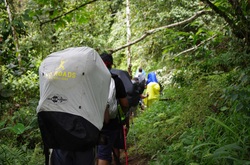
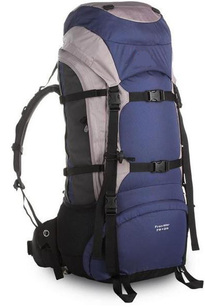
Pack selection is important. It will be worn all day so it must be comfortable. Gear within it will be pulled in and out many times a day. A good backpack will reduce the chance of injury, good pockets and access zips will reduce frustration when you are tired and cannot find something, and after hours of walking in the rain, hopefully your gear will be dry!
If you are carrying your own backpack or hired a personal guide, the backpack you take should be a bushwalking type, not a soft youth hostel traveller type. Please contact us if any clarification is required on this very important aspect. If you do choose to have a personal guide the pack that you bring to PNG will be given to him at the beginning of the trek. You will need to leave a space about the size of a large loaf of bread (3 to 4kg) in the pack for the personal guide to put his personal gear.
|
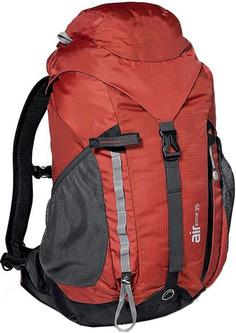
If you have a personal guide you will need to carry a day pack so you can carry some water, camera, valuables, snacks and your personal medical kit. Your personal porter will walk nearby so you can also access your big pack for items less frequently required.
Pack Weights
We must emphasize that the weight of your large backpack, whether carried by you or a personal guide should not exceed approximately 12 kg fully loaded (minus water). If it weighs more than this you are carrying too much and we suggest that you discuss with us what you are taking.
You should be aiming for around 12 kg in weight fully loaded without water. If you carry 2 to 3 litres of water this will add an extra 2 to 3 kg bringing the total weight to around 14-15 kg. For anyone trekking along the Kokoda Track this is heavy.
If you are carrying a day pack your pack fully loaded should ideally be between 5 to 6 kg without water. It should be light to carry, that is why you have hired a personal guide!
Remember that you are NOT carrying a tent, main meals or any cooking equipment or utensils! Your wonderful guide team will carry all this equipment.
Guide Team Packs
Our guides can carry up to 20 kg (25kg is the Internationally accepted limit though they normally carry between 15kg and 20kg). No Roads prefers to hire more guides instead of loading them up with more weight. We weigh our guide backpacks several times during the trek to ensure the load is distributed between all guides. The Kokoda Track Authority (KTA) Rangers will check pack weights to ensure guides are not overloaded.
Fitting your Backpack to You
It might seem strange to fit a backpack but it is definitely something that is very important. Most backpacks have adjustable hip belts, shoulder harness, and stabiliser straps but even then, the basic shape of the hip belt and shoulder harness could not be compatible with your body. In particular, women might want to look for backpacks that are developed for the female body.
Spend some time with the sales assistant to ensure you properly fit your backpack to your body. Test it in the store with some heavy objects inside it.
Spend some time with the sales assistant to ensure you properly fit your backpack to your body. Test it in the store with some heavy objects inside it.
Backpack - Selection Considerations
|
(required by everyone including people with personal porters)
|
|
Day Pack - Selection Considerations
|
(required for people with Personal Porters)
|
For people who have hired a personal porter, this is the pack you will carry.
|
Backpack Hire from No Roads
Many trekkers bring their own personal backpack with all their gear to trek along the track. If you don't have one and do not wish to purchase one, you can always hire one from No Roads Expeditions for $70 per trip.
The 70–80 litre backpack will be presented to you in Port Moresby the day before the expedition. Packs hired from No Roads will come with a waterproof cover. You should consider supplying your own dry-bag for the inside of the backpack. These can be purchased from an outdoor store or you could use a heavy duty garbage bag as a liner.
Please contact us at our office to hire a backpack before you leave.
Note: Your hire backpack is usually given to you upon arrival in PNG on the first day.
Backpack Rain Cover
|
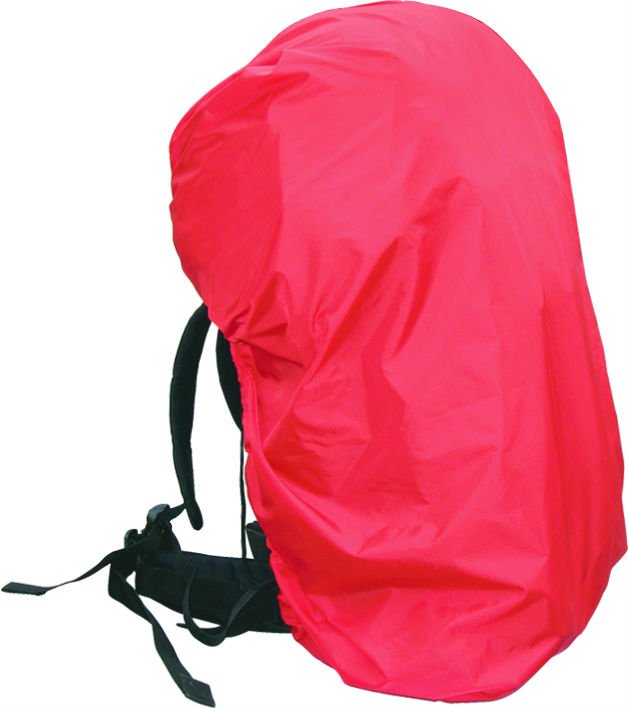
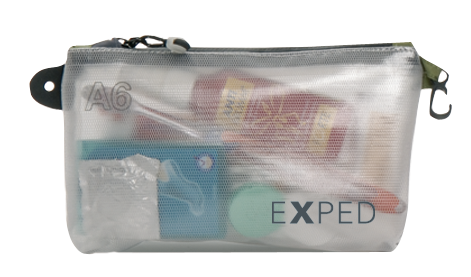
It is vital that all packs (day pack and backpack) have a purpose built waterproof cover (sheets of plastic or large plastic bags are totally unsuitable) and that all items inside the pack are stored in heavy duty plastic bags or “dry bags”, available from camping outlets.
Most new backpacks and day packs come with built‐in waterproof covers, please don't assume they are there. During the trekking segments each day we suggest putting your pack covers on, even if it is not raining. This assists in protecting your pack and saves time when it does rain, or when the jungle canopy drips all over you post rain. When you dive into your backpack looking for items and it is raining your gear packed in plastic bags or waterproof dry bags will remain dryer than without. There is nothing worse than wet campsite clothing or soggy toilet rolls! |
Adjusting your Backpack for Best Fit
Walking with a poorly fitted backpack, or one that is not adjusted correctly can lead to injury and make your trek unnecessarily uncomfortable.
If you haven't bought your backpack yet make sure you ask the sales assistant to spend some time explaining how to adjust all the straps and fit the pack to your height correctly before leaving the store. Most newer backpacks have some guidance material attached to the pack. Also, the manufacturer's website on the Internet often has information that may help.
The short video on the right has some general hints and tips for adjusting your backpack to fit you correctly.
|
|
|
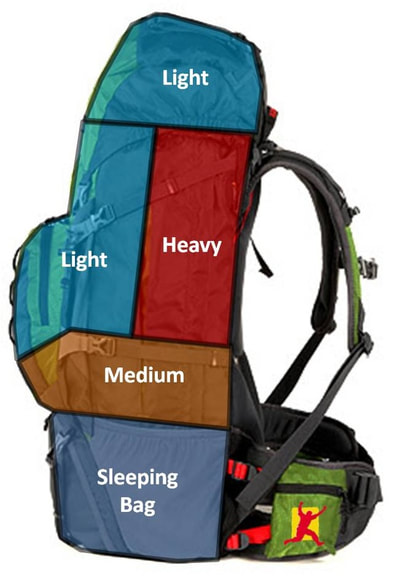
How to Pack your Backpack
|
Once your backpack is fitting nicely on your back and the straps are all adjusted properly, turn your attention to how your backpack is actually packed with all your gear so the frustration of stopping on the Track and needing the one item that is buried at the bottom of your pack is reduced.
|
Drag & drop your tab 4 content here
Trek Clothing
|
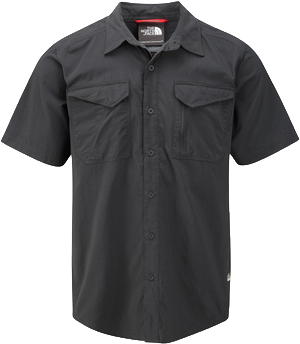
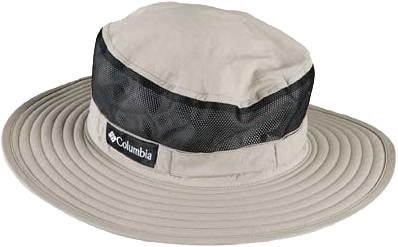
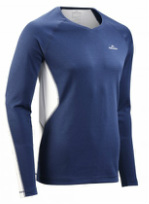
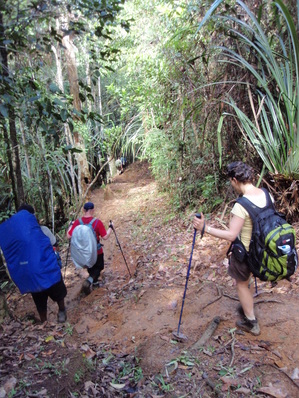
Taking too many clothes is a common mistake causing unnecessary pack weight. Most trekkers say they didn't use half of what they took when asked post trek.
You will need to wear in all your clothing to ensure it fits correctly and is fully tested before your trek. You will need a day set of clothes for trekking and a night set of clothes for camp. You should expect to use the same set of (what will become) filthy, stinking, cold and wet day clothes for hiking. |
You can rinse (no soap to be used) these each night in a creek as you bathe, but they never dry in time for the pre‐dawn kick‐off the next day. So you'll be climbing into damp clothes each morning – a good wake‐up call!
|
|
|
|
|
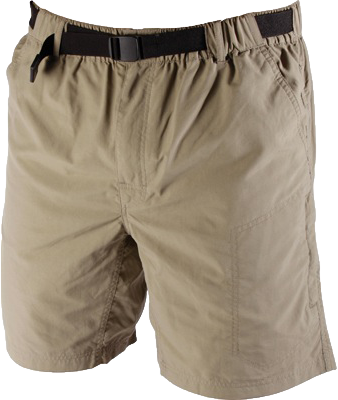
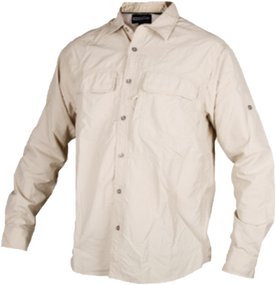
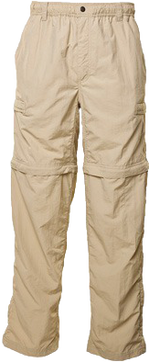
There is no need to wear long pants for protection against the undergrowth along the track. Most trekkers wear shorts because they get too hot. Long pants at camp each night are recommended.
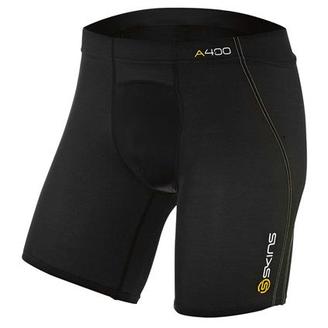
Chafing is a potentially serious problem in the moist jungle environment of Papua New Guinea, leading to bleeding, skin infections and extreme discomfort. It can be prevented by the wearing of bike-pants-style elastic undergarments such as Skins. They reduce chaffing and support the thigh muscles – reducing muscle fatigue. The length should only be as long as your shorts and you will only need one pair.
Chafing is a potentially serious problem in the moist jungle environment of Papua New Guinea, leading to bleeding, skin infections and extreme discomfort. It can be prevented by the wearing of bike-pants-style elastic undergarments such as Skins. They reduce chaffing and support the thigh muscles – reducing muscle fatigue. The length should only be as long as your shorts and you will only need one pair.
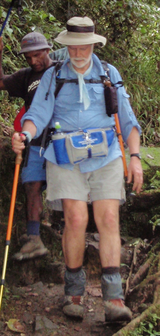
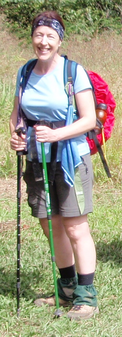
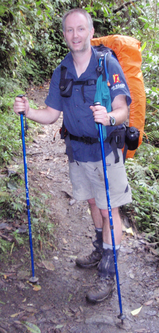
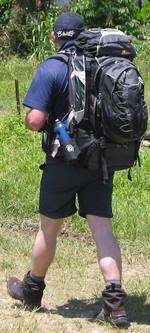
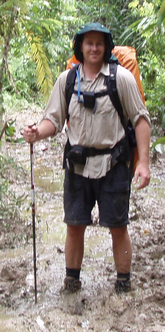
Some Examples of trekker Clothing
Click on the images below to see what these trekkers were wearing during their expedition.
Camp / Night Clothing
At camp you should try to remain dry so a night set of dry clothing is required. The clean, dry set used to climb into after a creek rinse off, dinner and into bed to enter an exhaustion‐induced coma until the next days trekking. Remember, if you do err in judgement and put on your clean‐dry clothes, they too we be dripping wet within 15 minutes of the day’s trekking, so don’t. Keep your fresh and dry clothes for relaxing and sleeping in each night.
Long pants and a long sleeved shirt is highly recommended to assist with protection against mosquito's at dusk, and dawn during breakfast. Some people take light‐weight track‐pants to sleep in. Light-coloured clothing and loose-fitting clothing tends to help protect against mossies.
Long pants and a long sleeved shirt is highly recommended to assist with protection against mosquito's at dusk, and dawn during breakfast. Some people take light‐weight track‐pants to sleep in. Light-coloured clothing and loose-fitting clothing tends to help protect against mossies.
|
|
|
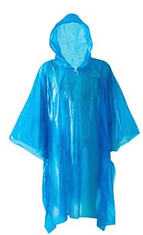
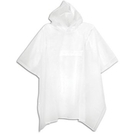
Raincoat / PonchoThe Kokoda Track snakes its way over the Owen Stanley Range and the weather can be very unpredictable. The tropical rain is often very thick and heavy with a short onset. It may rain every day of your trek, or maybe not at all. It is important that you bring wet weather protection to assist you in staying dry if required.
Trekking with a raincoat or poncho on is too hot in the tropical humid climate of PNG. There are times where you will stop and it will be raining heavily. This is when your poncho/raincoat may be of use. At camp some people choose to wear their wet weather gear to keep their dry clothes dry. In most camps there will be a shelter to eat under but they may leak. There are many types of ponchos to select from, but we do recommend you bring something that is lightweight and strong. Very cheap $10 ponchos may work but can rip easily.
If you have a waterproof cover for your backpack you do not need a large poncho that covers your backpack also, just a normal poncho. |
Clothing for Port Moresby and Flights
In addition to your clothing for the trek you will need some clothing for your time spent on flights in and out of Port Moresby and during your stay in Port Moresby. This clothing should by minimal and fit into a small carry-on bag or into your backpack.
Your time at the hotel should be used to relax so you will not need many changes of clothes. Most trekkers wear shorts/bathers and t-shirts around the hotel and sandals. The temperature is usually quite warm and humid in Port Moresby and cooler at night.
The warmer climate clothes may not be suitable for your destination upon leaving PNG at the end of your trek so consider packing warmer clothes if you think they are required.
Drag & drop your tab 5 content here
Hydration
Poor hydration can lead to dehydration and worse still, an emergency medical evacuation. Don't let this happen to you, stay hydrated. The information below will guide you in selecting the correct hydration systems for your trek.
Hydration Bladder
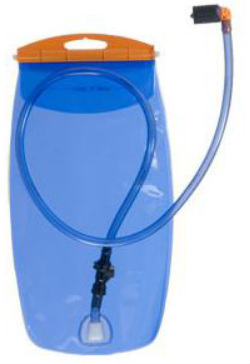
Hydration bladder water packs are essential. Water bottles are hard to carry in your hand whilst trekking so they end up stored in pockets on your backpack. We have noticed that trekkers tend to forget to drink when they cannot easily get to their water. Hydration bladders with a sipper tube solve this problem as it is easier to sip on water as you walk whilst your hands are busy.
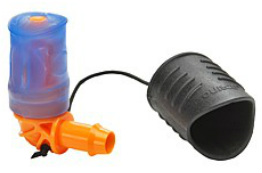
When trekking you tend to use both your hands for walking poles and cannot afford to carry a bottle of water. Trekkers don't like stopping to get their water bottles out from their packs and therefore don't drink enough water. Water bladders with a sipper tube solve this problem making it easy to keep drinking! The water bladder is used to carry the water safely in your pack. A water tube hangs over your shoulder with a bite‐valve at the end. Biting on the end gently and sucking gives you water. Avoid sipper tubes with taps that turn on and off - they just break and cause you grief in the long run. We have seen many break! In the drier months August to October, small creeks disappear so we suggest 2 or 3 litre water bladder packs so that you will have plenty of water on you. They usually come in 1, 2, and 3 litre capacity bladders. We recommend you obtain a water bladder with a wide opening for pouring water in from a bottle, a bite‐valve with a dirt‐cover to keep nasties out, and a good quality known brand as we have seen many cheap ones leak, or the bite‐valve breaking.
|
Water Bottle
|
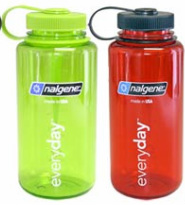
In addition to the hydration bladder you must bring a water bottle or two. The water bottle is useful for collecting water from streams. Hydration bladders are also used for the electrolyte replacement mixtures but be aware you will need to clean them carefully as they may clog at the bite‐valve if your mixture is very strong.
Most trekkers use the bottle as a refill bottle for the bladder and then carry some mixed electrolyte replacement so at all times you have water (in the bladder) and a electrolyte mix ready to drink in your bottle. Bottles come in many sizes and materials. We recommend a one litre bottle made from a lightweight plastic. Bottles with a wide opening will make it easier to fill from streams or pipes. |
Water Bottles with Wide Openings
|
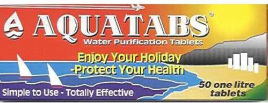
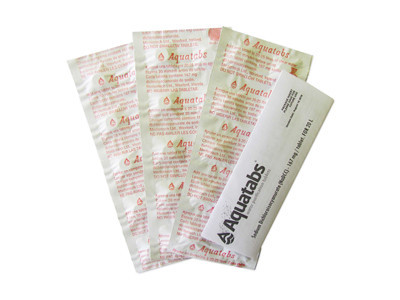
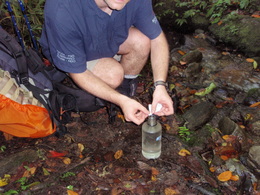
Water Purification TabletsWater purification is recommended at all times. Refer to the section on Water Quality for more information on this topic. There are many brands and types of tablets to treat reasonably clear water. One brand that is cheap, quick and has minimal after‐taste is Aquatabs.
Aquatabs are effervescent tablets which kill micro‐organisms in water to prevent cholera, typhoid, dysentery and other water borne diseases. Water treated with Aquatabs is ready to drink within 30 minutes. They are sold in packs of 50 tablets. Each table treats 1 litre of water. Take two packs to ensure you have enough. Taste Test It is important to taste test the water purification tablets before you trek to ascertain if you can handle the after taste. Try several different brands and use the one that best suits you. |
Water Treatment Devices
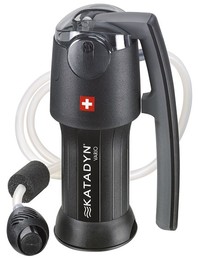
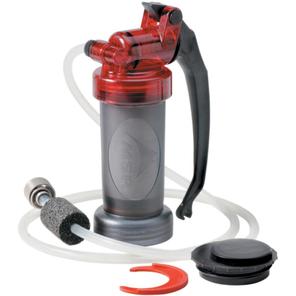
There are a number of devices on the market that are used to purify, or sterilise water for drinking. One such device that is popular with trekkers is called Steripen. One advantage with these devices is that you only have to wait a few minutes for the water to be sterilised. With water purification tablets you typically have to wait half an hour before you can drink the water.
Backup - Tablets
Both strategies work well. Aquatabs are inexpensive, small and lightweight, don’t add any discernible taste to the water and have been used safely for many years in areas with unsafe drinking supplies.
Make sure you have some backup purification tablets with you also, just in case your device breaks.
Batteries
If your device requires batteries, make sure you bring spare batteries! Practice replacing batteries so you have done it before.
Practice
Make sure you have practised using your device in the bottles you plan to use before using it on the Kokoda Track for the first time. It is surprising to see people using their devices for the first time on the trek. On your training walks, practice the technique and drink the water you prepare!
Drag & drop your tab 6 content here
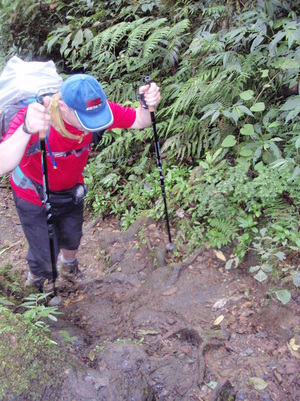
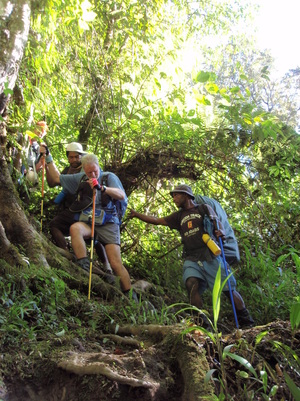
Trekking Poles
|
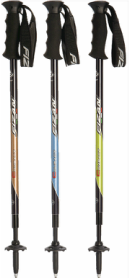
Trekking poles are simply walking sticks, and though historically used to aid formal hiking rather than everyday walking the principle is just the same.
They take many forms, ranging from single staves made from found wood to pairs of sophisticated height‐adjustable poles made from lightweight composite materials. It is true that our porters will create a trekking pole for you if you don't have one, and it will be better than none. Take note that it will not be adjustable, it will be much heavier than a purpose built pole, and your hand may end up with sores as it will lack a moulded hand grip. Please make sure you bring the plastic/rubber circular baskets as they will need to be used to help prevent your poles sinking into the mud. The rubber stops for the sharp end are useful for packing during flights. |
Extract from the Kokoda Expeditions Gear Checklist - Backpack and Trekking Equipment List
Benefits of Trekking Poles
|
Studies have proved that use of "ski poles" while walking reduces the pressure strain on the opposite leg by approximately 20%. Furthermore, while walking on level ground, poles reduce the body weight carried by the legs by approximately 5 kg every step. Move to an incline, and that reduction increases to 8kg. Think about this in the context of walking up and down the long hills along the Kokoda Track.
A study conducted at the University of Massachussetts at Amherst in 2001, showed that using poles lets hikers lengthen their strides, put less strain on their knees, and generally feel more comfortable. The hikers studied did not expend less energy, but the increase in stability made long treks easier. Effectively using two trekking poles reduces fatigue, increases speed (level, uphill and downhill), provides excellent stability, increases the distance that can be comfortably travelled in a day, and reduces accumulated stress on the feet, legs, knees and back. One of the legitimate complaints about trekking poles is that many people simply do not know how to use them correctly. As a result, these people get little or no benefit from them and the poles can simply get in the way. Fortunately, the proper technique is easy to pick up and can be mastered with a little practice. |
Trek Poles - Length Adjustment
Even though it is often stated that you can adjust the pole to suit the terrain, you will find that generally they can be set at the beginning of a journey and left for the duration. Adjust the length of your poles as follows:
- "Unlock" the upper and lower sections of both poles.
- Extend the lower section of both poles to just less than the maximum limit and "lock" the lower sections. Don't pull out too hard as they may come apart.
- Stand up straight with shoulders relaxed.
- Place one pole under an armpit and adjust the length so that the top of the pole is 5 to 8 cm below the armpit.
- "Lock" the upper section of that pole in place.
- Use the fully locked pole as a "ruler" to adjust the length of your second pole.
- Completing this procedure should result in a pole length that is a good compromise for both ascending and descending.
Wrist Straps
The wrist straps are critical to getting maximum efficiency from your poles. They should be adjusted so that when the hand is inserted through the loop, the wrist can comfortably apply pressure to the pole. If you turn the loop over your hand like a ski pole grip it should not be necessary to grip the pole tightly with your hand in order to apply the pressure.
Your thumb and fingers should merely form a "U" or an "O" around the grip. The area between the thumb and index finger becomes a point of articulation. While walking, the poles should act and feel as though the arms extend to the ground creating a second pair of legs. The poles should swing forward for the next step just as though they were legs.
The grips can be used as necessary, but for the most part the poles should be loaded using mostly the wrist straps.
Navigating Terrain
|
Level ground to slight uphill:
Poles are used the same as in cross‐country skiing. Tips of the poles are behind the body. Left foot is forward while left pole is back and similarly with the right. Forcefully load the poles to aid in forward movement. On steep uphills: Left pole is planted at the same time as the left foot and similarly with the right. Load the pole to reduce the weight that the leg has to lift. Poles are even with the body for moderate upgrades and can be moved in front of the body for steeper inclines. Slight to moderate downhills: Descending moderate declines you can use the exact opposite of level to slight uphill technique. The poles are in front of the body. Left foot is back while left pole is forward and similarly with the right. Load the poles to control forward movement. Steep downhills: For these the configuration is nearly the opposite of when climbing steep terrain. Left pole is planted just before the left foot and then the right. Load the pole to help control placement of the foot. On slippery surfaces lean forward (the natural tendency is backward) and trust your poles. The poles will help maintain downward force on the feet to prevent them from slipping. On extremely steep slopes or rock steps you might place both poles in front and lower your weight down. NB: Practice the various techniques carefully to make sure that you are comfortable and safe using them and that you can learn the limits of the poles on different surfaces. Source: Paddy Pallin website. |
One Pole or Two?
All the above comments are assuming you are using a pair of poles. One pole will do some of the above but not all. One is better than none but two will provide more than twice the benefit.
If you have knee or back problems, intend to use the poles all the time or are carrying a load, I would recommend two poles. You could always try one and add a second later.
If you have knee or back problems, intend to use the poles all the time or are carrying a load, I would recommend two poles. You could always try one and add a second later.
Drag & drop your tab 7 content here
Camping Gear
No Roads will provide the following items at the camp-site and along the Track:
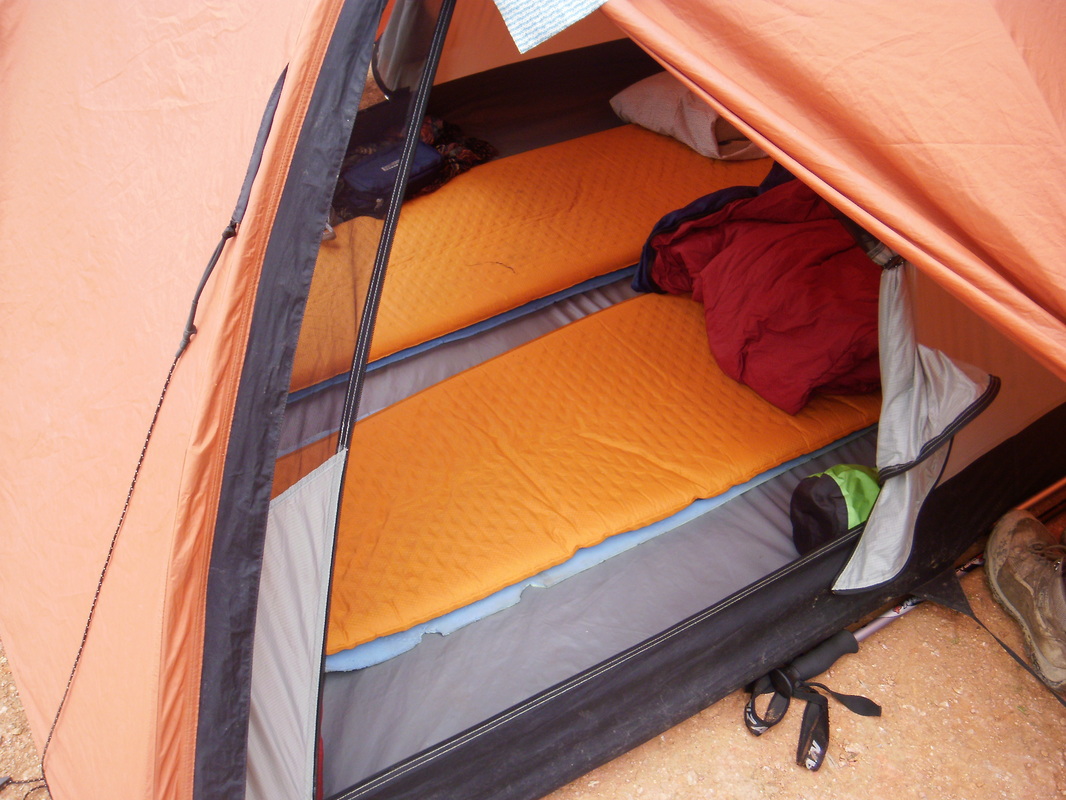
- a twin share tent (or use a guest house if they are available)
- a 1.0cm thin sleeping mat foam roll
- shower tent is available
- cooking equipment for the cooking porters (also see Meals and Snacks)
- eating utensils
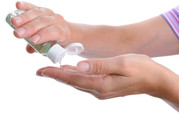
- large pump pack antibacterial waterless hand soap for meals (in addition to your personal supply)
- cups - mugs for coffee/tea etc.
- use of the local toilets (or eco-toilets where installed and open)
- rubbish bags
You do not need to bring, and should not bring ......
|
|
|
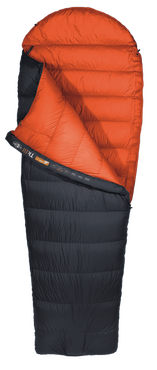
Sleeping Bag and LinerThe temperature along the Kokoda Track will vary with the more elevated campsites colder overnight. No Roads recommends you bring a two season sleeping bag rated at zero degrees Celsius.
Sleeping bags come in many shapes and sizes and for this trek a sleeping bag that is lightweight and compacts down into a small package is ideal. Many manufacturers now even make "trek" style sleeping bags.
Silk Liner A sleeping bag liner is either made from silk or cotton and forms a liner bag that is put inside your sleeping bag to keep it cleaner. The liner also keeps you warmer by a few degrees. Some trekkers prefer to sleep in the liner alone in some locations whilst those people who feel the cold may use both to keep warm. The silk ones tend to be much lighter but more expensive. If you do feel the cold consider bringing a lightweight beanie also. |
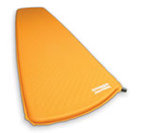
Sleeping Mat and PillowTo sleep on, No Roads will supply thin foam sleeping mats.
These are really only adequate to protect your own thin inflatable mattress and provide a barrier between your gear and the tent floor, or Guest House floor. To supplement the thin sleeping mat that is provided, bring a self-inflating sleeping mat. There are many brands to choose from now. No Roads recommends a "trekking" style sleeping mat that is lightweight (1kg or less) as some of these mats can be huge and heavy. Consider a half size mat to reduce weight. Do not bring large, heavy or bulky items. TIP: Take a pillow slip to stuff clothes into to use as a pillow, or buy an inflatable trek style pillow. |
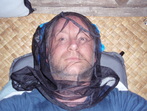
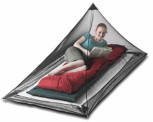
Mosquito NetsAt dawn and dusk the mosquitos will be flying around so this is when you want some protection. This is why you should wear a long sleeve top and pants in addition to applying mosquito protection lotion/spray.
Whilst you are sleeping it is important to be protected from mosquito bites. If you are sleeping in a tent and the fly is zipped up you don't have to use one. or In the guest houses you can either use head net, or a full net. If you bring a full net you will need to bring some cord to help hang it up - around 2-3m in length. The full nets can be heavy and come in one or two bed sizes - some include the cord to hang it up. The head nets work well but some people find them difficult to use with the net touching your face. You will also need to be inside your sleeping bag or liner to provide the full body protection so no skin is exposed. These nets are very lightweight. Note that people often like to sleep in the huts which have a lot more space. Therefore, please bring a head net ot bed net. |
Each night a tent with a fly screen will be made available (2 people per tent). |
Cleaning Towel
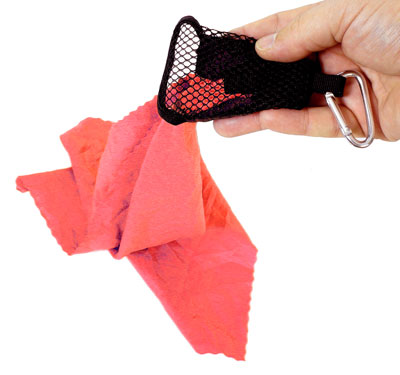
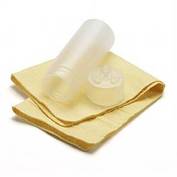
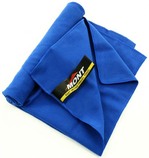
A quick-dry sports towel/chamois is all that is needed as a towel. Just about everything gets wet and stays damp so they work well.
Everyone will smell but after a while you don't notice, except when you have had a rinse off in the creek or under a shower at camp. Most trekkers bring a sports deodorant of some kind but don't bother too much to use it during the trekking each day.
No soap is allowed in the creeks or rivers. In camp-sites without creeks or rivers there is usually a shower set-up by the locals for our use. These showers may not have any privacy so most people stand under them in bathers.
If you want a hot shower and to use soap you can ask the Local Guide to set up a shower tent. If you would like warm/hot water there is a small cost. They will need to heat up the water on the fire and it may not be available every night.
Personal ToiletriesPack two rolls of your favorite toilet paper in a resealable plastic zip-lock bag.
Wet loo paper isn't fun! Place a length of string through the toilet roll and make a loop big enough to place over your head. This is one trick to avoid dropping it. Cut your toothbrush in half to short the length and reduce weight. Ask your dentist for a small tube of toothpaste as they usually have samples. |
Personal MedicationsPlease make sure you have enough of your usual medications with you on the trek. If you have something you are particularly prone to such as ear infections or sinus problems, bring what you need with you.
Pack the medications in the original packaging so that customs can see that they are prescriptions. On the track you can take the medications out of their bulkier packaging and place them into zip-lock bags or smaller trekking medication containers. Make sure everything is clearly labelled even on the zip-lock bags so you don't mistake medications or lose them when your pack has exploded open in your tent or guest house when searching for something else. Prescribed Medicines Anyone using any prescription medicines regularly should carry a supply for the whole duration of their expedition. Please consult your doctor and include items and medicines that may be required for you or for the area you are travelling in. No Roads does not supply any medicines and takes no legal responsibility for any medical treatment or professional medical support to our clients. We will do everything we can to support guests that have disclosed a medical condition, allergy or anaphylaxis, by informing all in country personnel and ensuring reasonable provisions are made. We do however, suggest and encourage all guests in this situation to assist us by reconfirming this information in situations or instances where it may be required to ensure everyone has a safe and enjoyable adventure experience. |
Antibacterial Hand Wash
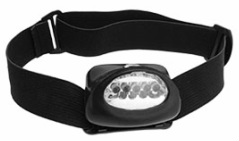
Head-LampEach morning and evening you will need a torch or head-lamp to see where you are going, inside your tent, guest house hut or when going to the toilet.
Most people prefer a head-lamp over a torch as it is hands free. The newer LED style ones are very lightweight and have a great light output. The batteries should last all expedition if they are new but you should bring some spares just in case. There isn't a need for another torch if you have a head-lamp, it will just be extra weight. |
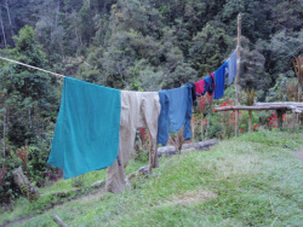
Clothesline
|
At camp each afternoon and you may have an hour or so to dry clothes, if the sun is out. Remembering that clothes don't dry to well in the humid environment, some people like to try.
At most camp sites a clothes line of sorts will be available. If not the Guides will erect a clothesline for everyone to use. Items are usually just draped over the line to drip dry. |
Drag & drop your tab 8 content here
Personal First Aid Kit
|
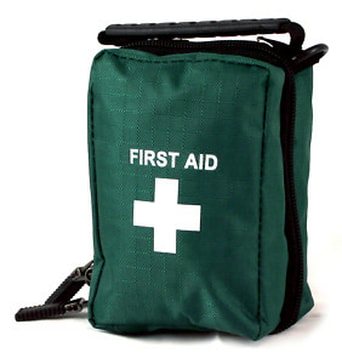
All trekkers must carry a personal first aid kit with basic first aid supplies, medicines for common ailments, cuts and bruises, pain killers, etc. Anyone using any prescription medicines regularly should carry a supply for the whole duration of the expedition. If you have something you are particularly prone to such as ear infections, sinus problems or mild asthma bring what you need with you.
Trekkers should not share one first aid kit between many people. This is to ensure that all members of the expedition have enough supplies for each other. There will not be any chance to resupply in Port Moresby or on the Track. Please consult your doctor and include items and medicines that may be required for you specifically. No Roads does not supply any medicines and takes no legal responsibility for any medical treatment or professional medical support to our clients. The No Roads expedition guide carries an extensive Wilderness First Aid Kit that will be used only for emergencies and for the provision of first aid to the porter team if required. |
Each person should have a emergency first aid kit containing at least the following items:
Tips:
- Pack items that could leak into plastic bags (zip lock bags). There is nothing worse than sticky liquids draining through your pack.
- Protect pointy sharp items like scissors and tweezers packed in between padded objects.
- Don't pack items into your first aid kit until you have understood what they will do for you and how to use them. Write some notes on a piece of paper and keep it with your kit if to remind you if needed.
- Keep some of the packaging that has instructions for you, if they are consumables you don't use frequently or not familiar with. Remove bulky packaging otherwise, but keep the items protected in bags etc..
- You do not need a first aid kit like a paramedic, but you will need enough to manage eight days. i.e. a new band aid per day on one cut will drain a poorly stocked kit quickly.
Personal Health and Hygiene Equipment
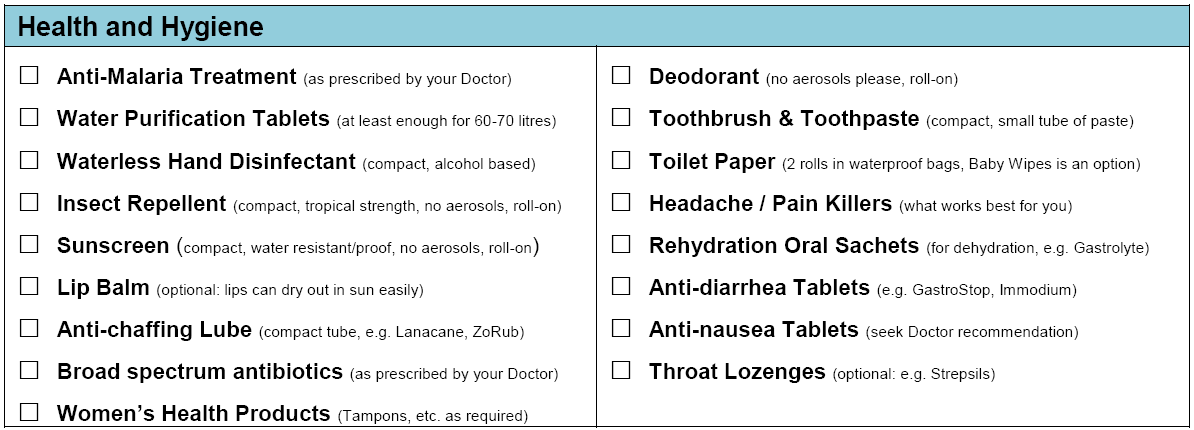
In addition to an emergency first aid kit you will need some equipment and medical items to help deal with health and hygiene issues during your expedition. Whilst some of these items are covered in other areas of this website, we have included it here with the first aid kit to ensure both lists are considered at the same time.
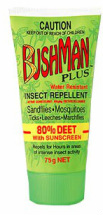
Sunscreen and Insect RepellentIt is important that you protect yourself from the sun and from insect bites such as from mosquitoes. The problem with most household insect repellents is that they are not usually water resistant or strong enough for the jungle conditions.
There are several brands of tropical strength insect repellents that include sunscreen. These products are recommended as part of the solution to the prevention of mosquito bites and sun protection. Please ensure you read the warning labels on the tropical strength products as they contain very strong chemicals. Practice using these products during your training walks to ensure you are comfortable using them. |
Drag & drop your tab 9 content here
Camera
|
Electronic devices such as cameras or video recorders are a great idea to take with you to record your journey. We are often asked what camera to take and that is a good question.
There are three main issues that you need to consider so that you are not disappointed:
Smart Phone Cameras Most people have smart phones with amazing cameras these days, and some of the more modern smart phones are also water resistant or water proof. The big problem with smart phones being used as your camera is that they typically have a short battery life, and the ability to recharge them via 240 volt power is zero on the track. Some of the remote villages along the track have solar charging stations installed for the locals. We often find them broken, or full with local phones charging and unable to be used by trekkers. You are strongly recommended to consider the challenges of recharging your smart phone and the weight of recharging battery packs which do weigh a lot. One option is a small trekking style solar power charging array which are great, but you will find they don't get enough charging time on the Kokoda Track with a lot of under canopy trekking and campsites with early sunsets due to steep valleys. |
Waterproofing
It is likely to rain along the Kokoda Track so we recommend you bring a camera that is at least water resistant, or better being waterproof. Keeping your camera in a plastic bag or zip-lock bag is okay for a while, but the likelihood of water entering the bag and getting onto the camera is high, and humidity generally impacts after a few days.
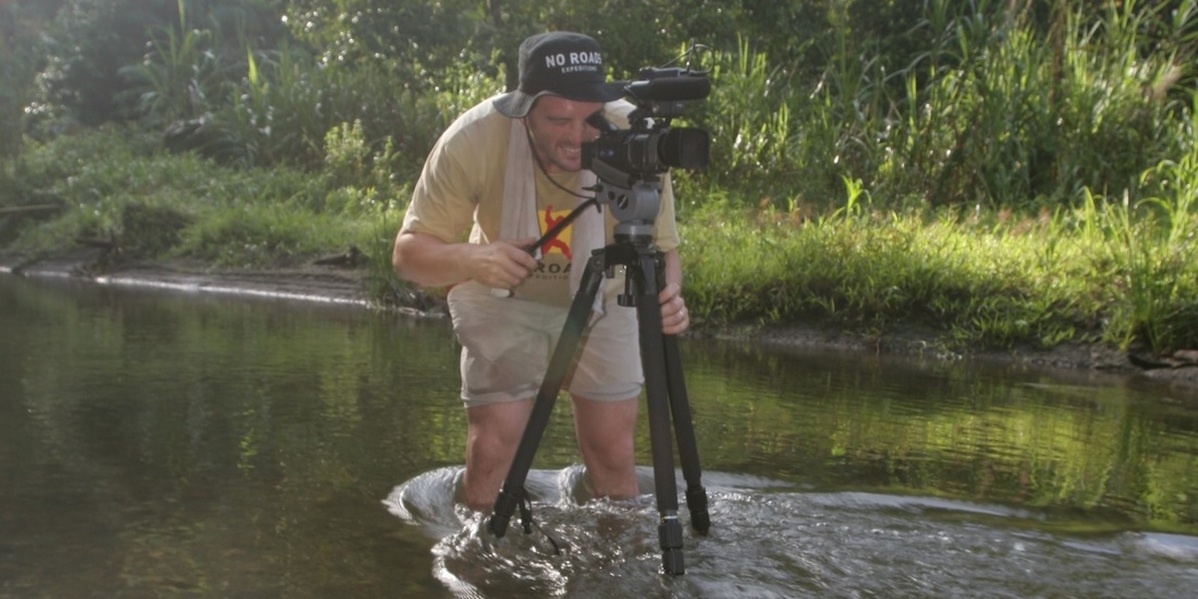
There are a number of manufacturers that sell waterproof cameras that are really good and not too expensive. If you plan to bring your expensive SLR type camera to get the amazing shots, be realistic that there is a real risk of damage - do you really want to risk it? Large bulky cameras are also difficult to carry and will reduce your enjoyment of the trekking experience.
There are a number of manufacturers that sell waterproof cameras that are really good and not too expensive. If you plan to bring your expensive SLR type camera to get the amazing shots, be realistic that there is a real risk of damage - do you really want to risk it? Large bulky cameras are also difficult to carry and will reduce your enjoyment of the trekking experience.
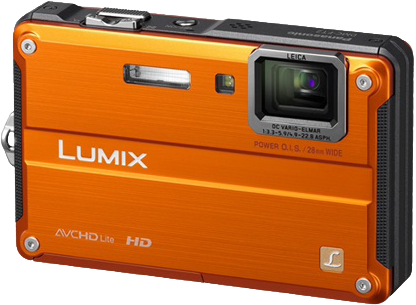
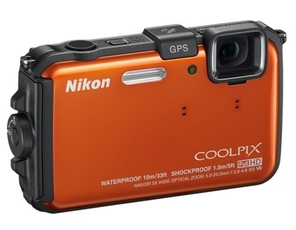
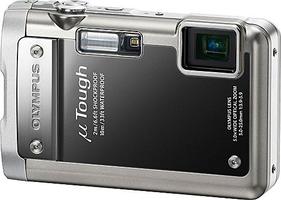
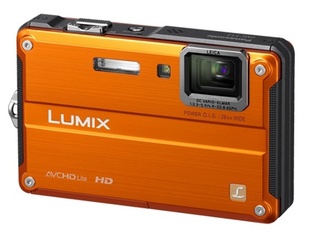
Example Cameras
There are a wide range of waterproof cameras available for the general public that are suitable for all Kokoda expeditions. No Roads Expeditions does not endorse a particular manufacturer or model, but we have provided a few example images below of what they may look like.
Overheating and Humidity
As it is hot and humid along the Kokoda Track some cameras find it difficult to work properly with their built-in humidity sensors causing cameras to fail. Cameras that are waterproof or water-resistant do not seem to have this problem as the camera is essentially sealed from the conditions. Older smart phones DO suffer from this problem unless they are water resistant or waterproof.
If you plan to take a video camera please check the user manual for the operating temperatures and comments about humidity.
If you plan to take a video camera please check the user manual for the operating temperatures and comments about humidity.
Battery Life
Modern cameras tend to draw less power than older ones and their batteries are very good. A single set of batteries will typically last for many hundreds of photos.
If you plan to take a lot of photos and/or video, bring some extra fully charged batteries as you will not have anywhere to charge them along the track, unless you bring a solar charging unit. Solar charging stations in some of the villages are often broken or unable to be used as the locals have their phones charging.
If you plan to take a lot of photos and/or video, bring some extra fully charged batteries as you will not have anywhere to charge them along the track, unless you bring a solar charging unit. Solar charging stations in some of the villages are often broken or unable to be used as the locals have their phones charging.
Travelling Safely with Lithium Batteries
|
What's allowed and what is not allowed when it comes to batteries on aircraft changes over time. Most smaller batteries used in consumer electronics, such as laptops, mobile phones, handheld games devices, digital cameras and other personal electronic devices, are allowed as both as checked and carry-on luggage items.
Spare camera batteries must be protected from damage and short circuit. Battery-powered devices should be protected from getting turned on accidentally. The CASA video provides a great explanation of what is allowed and what is not allowed on an aircraft. TIP: Always check with your airline what the precautions are for your spare batteries. |
|
Hints and Tips
- Bring along extra memory cards so you can replace a damaged one and also take lots and lots of photos. Keep them in a zip-lock bag with a silicon absorbing sachet like you find packaged with electronic goods.
- Work out how to attach your camera to the front of your shoulder straps on your backpack so you can access your camera easily whilst trekking. You will take more photos if you can get at the camera easily. Having your camera hanging around your neck on a strap will not be safe or work well.
- Practice taking shots in conditions with lower light (as if you are under a jungle canopy) and conditions where you have lots of backlight. If you master these shots you will get better results along the track.
- Avoid opening your camera battery and memory card covers so the chance of humidity or water entering is reduced. e.g. don't open when raining!
- Remember to look around and take in the sights at all levels - close to the ground, up high in the trees and behind you. Lots to see.
- Photo permission - it is polite to ask before taking photos of locals in the villages, especially their kids.
Drag & drop content here
