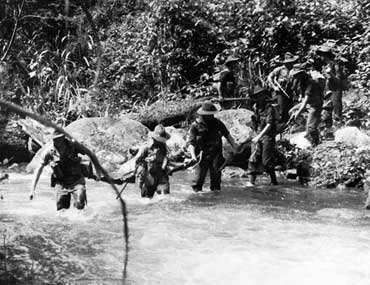
The Stanley Detachment’s delaying tactics proved fruitful, by the time they had withdrawn to Templeton’s Crossing the defensive position at Templeton’s held approximately eight hundred men and 4 mountain guns.
The advancing Australian forces were also strengthening with the fresh 16th Brigade now also in place in the front line beside Brigadier Ether’s 25th Brigade. Over three thousand troops were at Major General Tubby Allen’s disposal and attacks commenced against the Japanese position at Templeton’s Crossing on the 17th of October.
The attacks in the Templeton’s area were a remarkable success, using the same flanking and out flanking tactics the Japanese had used so successfully in their advance, the Australians drove the Japanese back.
Australian attacks continued through till the 20th of October, it was on this day a frontal attack by the 2/2nd and 2/1st Battalions swept the opposition aside and the diggers stormed through the Japanese defences.
The Japanese whom at this stage were severely exhausted, suffering from lack of food, ammunition and medical supplies withdrew once again with the intent of resisting at the next crossing of Eora Creek. It is worth noting that it was in this period of the campaign evidence suggests that the Japanese were so short on food they began to cannibalise the dead.